.
.Using a Computer for Wireless Tethered Photography
- An Introduction to Wireless Tethered Photography
- A Visual Guide to Wireless Connections
- Prepping the Computer
- Prepping the Camera
- Wireless Tethered Photography
An Introduction to Wireless Tethered Photography
When shooting with the camera connected to a Mac or Windows computer via a USB cable, you can use tethered shooting software to download the pictures directly to your computer. You can also control the camera remotely using the [FUJIFILM Tether Shooting Plug-in PRO plug-in for Adobe® Photoshop® Lightroom®] or [HS-V5] software. “Wireless tethered shooting” lets you connect to the camera via a wireless (Wi-Fi) network instead of a USB cable.
Read on for more information on wireless tethered shooting.
A Visual Guide to Wireless Connections

Prepping the Computer
Install the software needed for wireless tethered shooting to a Mac or Windows computer that is connected via a network to the router that will be used to connect via Wi‑Fi to the camera.
Tethered shooting is available with [Adobe® Photoshop® Lightroom®], [HS‑V5], and [FUJIFILM X Acquire]. When using [Adobe® Photoshop® Lightroom®], you will need one of the following two plug-ins: the [FUJIFILM Tether Shooting Plug-in PRO] or the [FUJIFILM Tether Shooting Plug-in]. [HS‑V5] requires [HS‑V5] software (available separately). [FUJIFILM X Acquire] is available for free download from the FUJIFILM website.
Prepping the Camera
Ready the camera for connection to a wireless network.
-
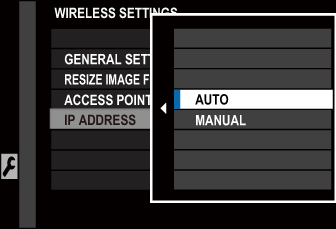
Select [AUTO] or [MANUAL] for D[CONNECTION SETTING] > [WIRELESS SETTINGS] > [IP ADDRESS]. If you chose [MANUAL], select an IP address ([IP ADDRESS]), network mask ([NETMASK]), and gateway address ([GATEWAY ADDRESS]).
Be sure that [OFF] is selected for D[CONNECTION SETTING] > [PC SHOOT MODE].
-
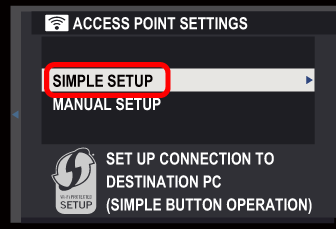
Check whether the router is equipped with a WPS button. If it is, proceed to “Simple Setup”. If it is not, proceed to “Manual Setup” instead.
The camera must connect to the router during the prep stage to configure the network connection. Be sure the router is on and ready to connect.

Simple Setup
If the router is equipped with a WPS button, you will be able to connect to the network without entering a password or adjusting other network settings.
Before proceeding, check that the camera and Wi-Fi router are on.
-
In the camera menus, go to D[CONNECTION SETTING] > [WIRELESS SETTINGS] > [ACCESS POINT SETTINGS], highlight [SIMPLE SETUP], and press [MENU/OK].
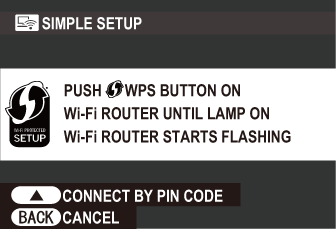
The camera will display a message prompting you to press the WPS button on the router.
-
Press and hold the router WPS button until the WPS lamp starts to flash.
This step must be completed within two minutes of your selecting [SIMPLE SETUP] in the camera menus.

-
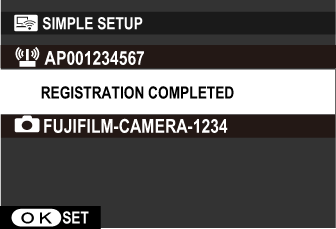
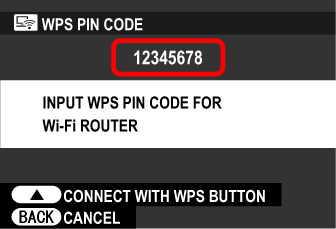
When the camera connects to the router, press [MENU/OK].
To connect using a PIN, press the selector up in Step 1. The camera’s WPS PIN will be displayed; to connect, you must enter the same PIN on the router as described in the router documentation.
Manual Setup
Before proceeding, check that the camera and Wi‑Fi router are on.
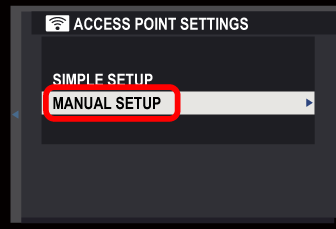
To connect manually to a network by entering the network name (SSID) or choosing from a list of the networks detected by the camera, go to D[CONNECTION SETTING] > [WIRELESS SETTINGS] > [ACCESS POINT SETTINGS] in the camera menus, highlight [MANUAL SETUP], and press [MENU/OK].
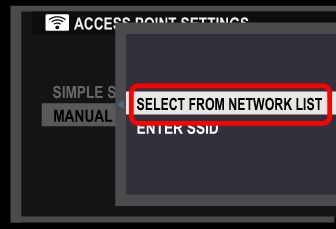
Proceed to “Choosing a Network from a List” to choose from a list of networks or to “Entering a Network Name (SSID)” to enter the network name manually.
Choosing a Network from a List
-
Highlight [SELECT FROM NETWORK LIST] and press [MENU/OK].
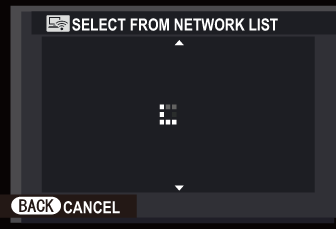
The camera will start searching for wireless networks.
If no networks are detected, the camera will display an error and return to shooting or playback.
-
Highlight a network and press [MENU/OK].
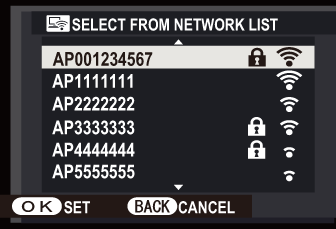
A
 icon indicates that the network requires a password. After entering the password, highlight [SET] and press [MENU/OK].
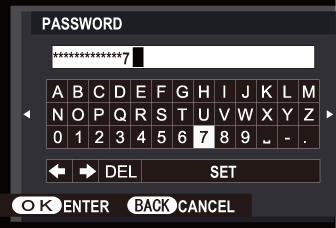
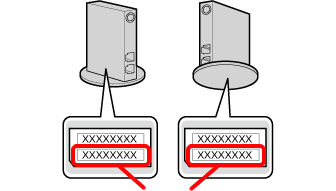
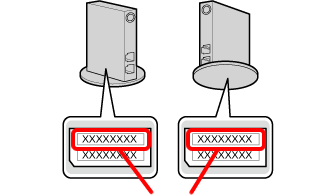
The default password may be found in the documentation provided with the router and in some cases on the router itself.
Password (KEY)
A message will be displayed while the camera connects.
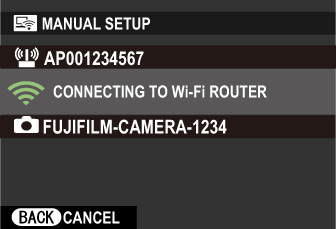
-
When the camera connects to the router, press [MENU/OK].
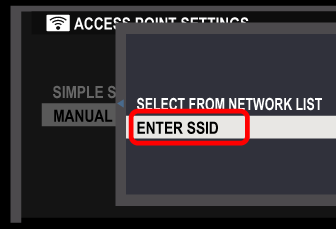
Entering a Network Name (SSID)
-
Highlight [ENTER SSID] and press [MENU/OK].
-
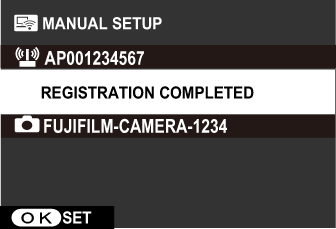
Enter the network name (SSID). When entry is complete, highlight [SET] and press [MENU/OK].
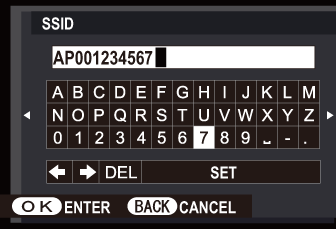
The default SSID may be found in the documentation provided with the router and in some cases on the router itself.
SSID
-
Highlight the type of encryption used by the network and press [MENU/OK].

-
Enter the password. When entry is complete, highlight [SET] and press [MENU/OK].
The default password may be found in the documentation provided with the router and in some cases on the router itself.
Password (KEY)
A message will be displayed while the camera connects.
-
When the camera connects to the router, press [MENU/OK].
Wireless Tethered Photography
Choose a connection type and take pictures remotely.
-
In the camera menus, select D[CONNECTION SETTING] > [PC SHOOT MODE] > [WIRELESS FIXED]. The camera will connect to the Wi‑Fi network selected in “Prepping the Camera” and wait for a connection from the tethered shooting software installed on the computer.
-
Launch the tethered shooting software on your computer and select [Preferences] > [Camera Search] > [Network]. If the camera and computer are on the same network, select [Search within the segment].
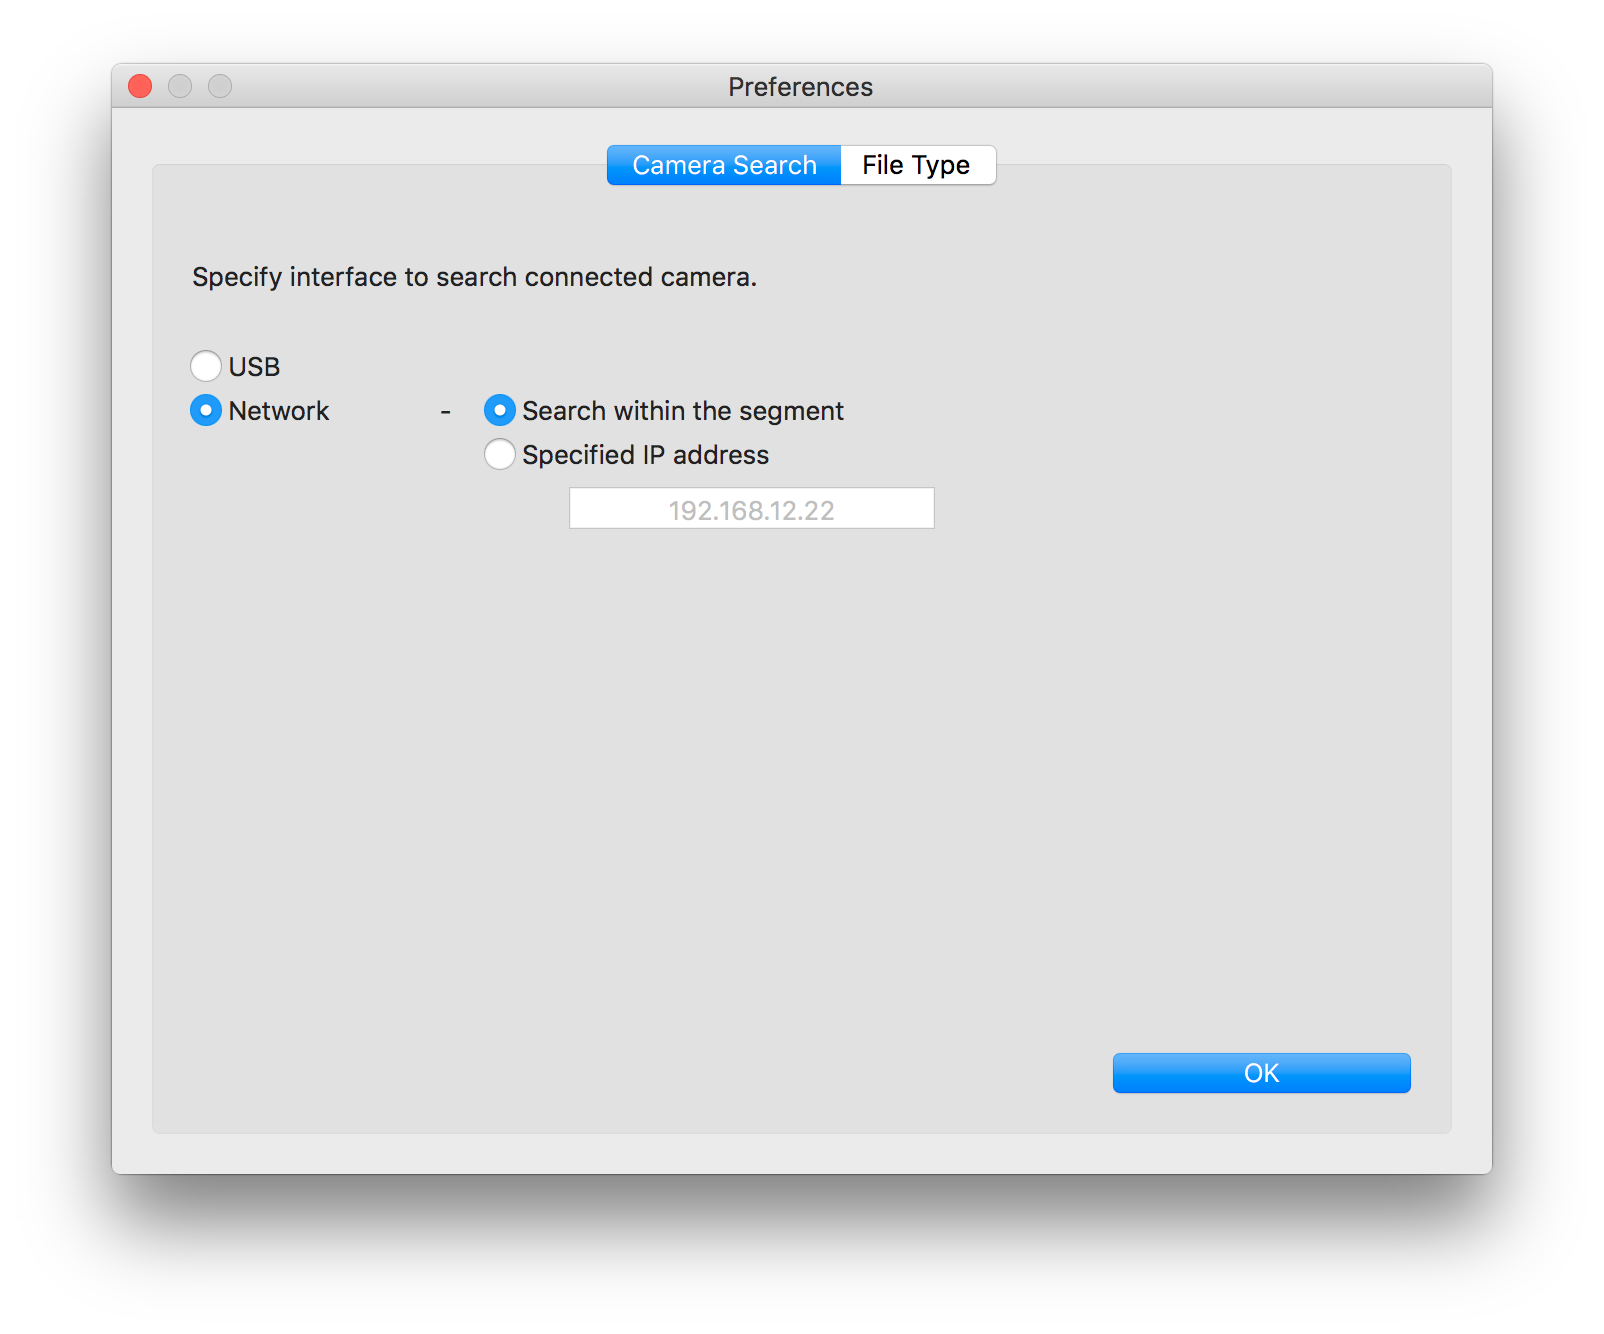
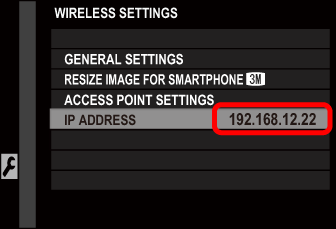
If the camera and computer are on different networks, go to D[CONNECTION SETTING] > [WIRELESS SETTINGS] > [IP ADDRESS] in the camera menus, check the camera’s IP address, and then select [Specified IP address] on the computer and enter the IP address.
Connections via a router that has NAT or IP Masquerade enabled are not supported.
At default settings, pictures taken with the camera during wireless tethered photography are not saved to the camera memory card. Use the file format option in the tethered shooting software to choose the file type.
The Indicator Lamp
During wireless tethered photography, the camera indicator lamp shows camera status as follows:
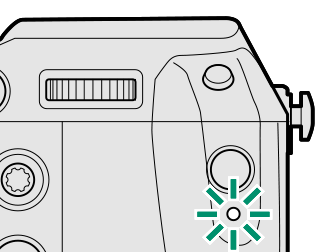
| Indicator lamp | Camera status |
|---|---|
| Flashes red | Searching for router. |
| Flashes amber | Connected to router and awaiting connection from tethered shooting software (connection lost). |
| Flashes green | Ready for tethered shooting. |
| Red with red flashes (red) | Searching for router; pictures awaiting upload. |
| Red with amber flashes | Connected to router and awaiting connection from tethered shooting software (connection lost); pictures awaiting upload. |
| Red with green flashes | Ready for tethered shooting; pictures awaiting upload. |
| Green | Subject in focus. |
| Flashes green | Focus or exposure warning. |
Uploading Pictures
Wi‑Fi connections conform to IEEE 802.11b/g/n standard and are slower than USB. Given the extremely long times required, we recommended that you do not attempt to upload RAW images or other large files via Wi‑Fi.
Place the camera as close as possible to the router. Distances of no more than a few meters are recommended.