.
.Parts of the Camera
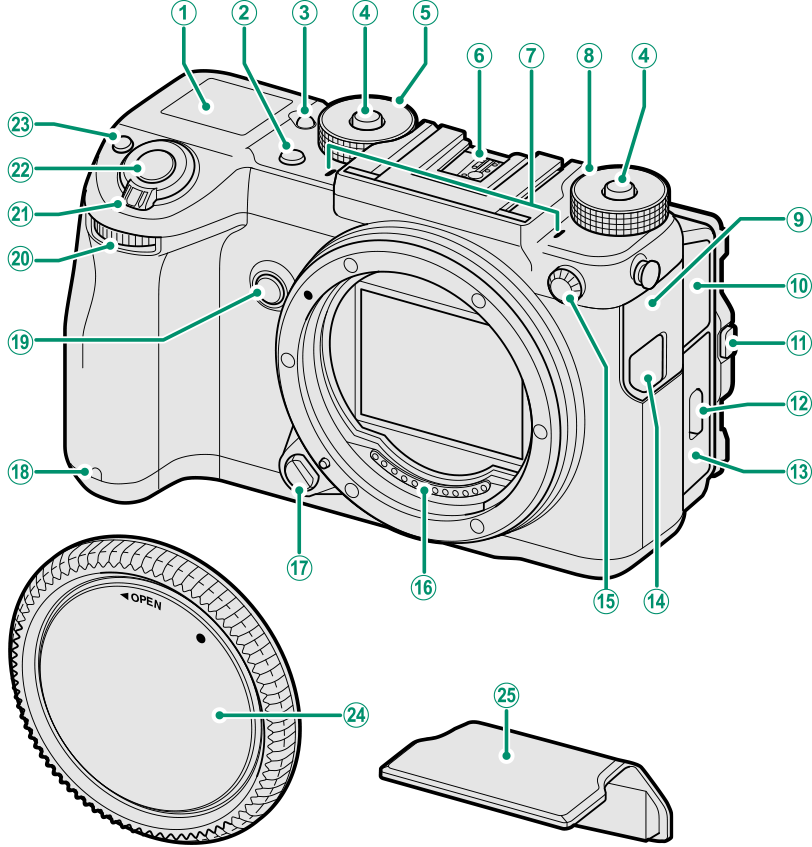
ASecondary LCD monitor
BDrive button
CSecondary monitor backlight button
DDial lock release
EShutter speed dial
FHot shoe
GMicrophone
HSensitivity dial
IConnector cover 1
JConnector cover 2
KTilt lock release
LBattery-chamber cover latch
MBattery-chamber cover
NRemote release connector cover
OSync terminal
PLens signal contacts
QLens release button
RSelf-timer lamp
S[Fn2] button
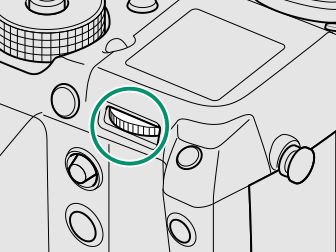
TFront command dial
U[ON]/[OFF] switch
VShutter button
W[Fn1] button
d (exposure compensation) button
XBody cap
YHot shoe cover
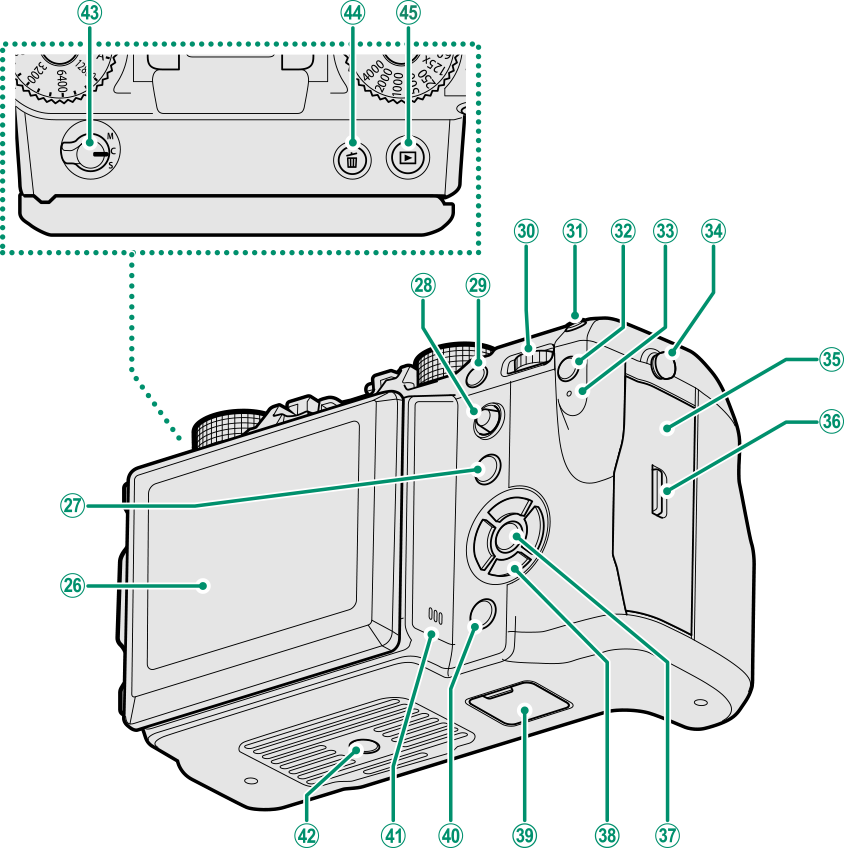
ZLCD monitor
Touch screen
a[Fn5] button
bFocus stick (focus lever)
c[Fn4] button
dRear command dial
e[Fn3] button
f[Q] (quick menu) button
gIndicator lamp
hStrap anchor
iMemory card slot cover
jMemory card slot cover latch
k[MENU/OK] button
lSelector buttons
mVertical battery grip connector cover
n[DISP] (display)/[BACK] button
oSpeaker
pTripod mount
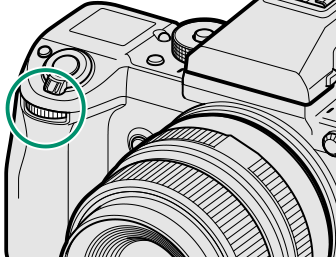
qFocus mode selector
rb (delete) button
sa (playback) button
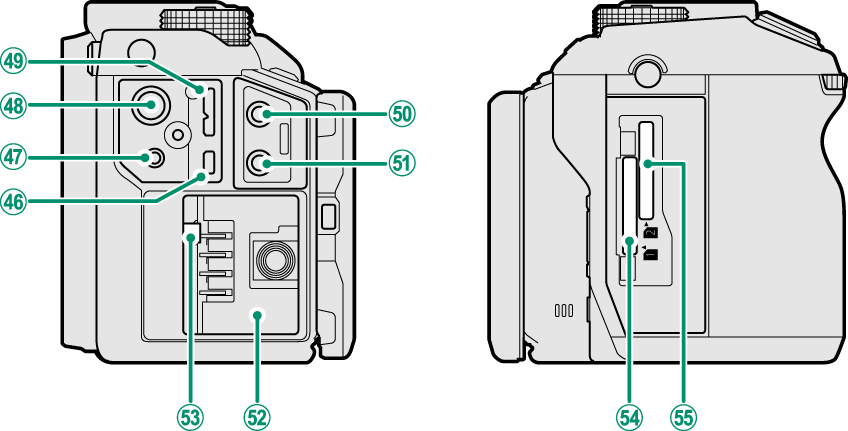
tHDMI Micro connector (Type D)
uRemote release connector (φ 2.5 mm)
v15 V DC-IN connector
wMicro USB (Micro-B) USB 3.0/USB 2.0 connector
xMicrophone jack (φ 3.5 mm)
yHeadphone jack
zBattery chamber
0Battery latch
1Memory card slot 1
2Memory card slot 2
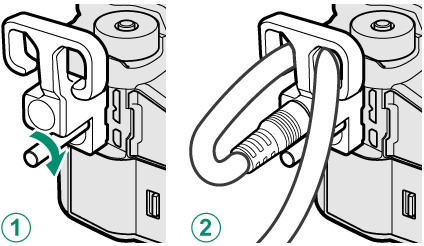
The Cable Protector
AThe cable protector prevents accidental disconnection of the USB cable or AC adapter. Attach the protector as shown and tighten the lock screw.
BConnect the cable and pass it through the protector as shown.
The Serial Number Plate
Do not remove the serial number plate, which provides the FCC ID, KC mark, serial number, and other important information.
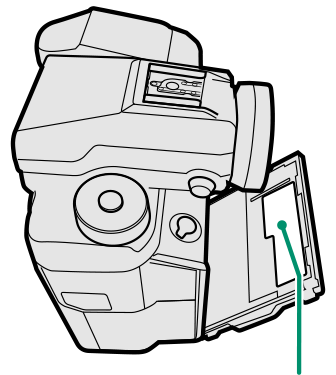
Serial number plate
- The Selector
- The Focus Stick
- The Shutter Speed and Sensitivity Dials
- The Command Dials
- The Drive Button
- The Indicator Lamp
- The LCD Monitor
The Selector
Press the selector up (e), right (h), down (f), or left (g) to highlight items. The up, right, down, and left buttons also double as function buttons [Fn6] through [Fn9] (aThe [Fn] (Function) Buttons).
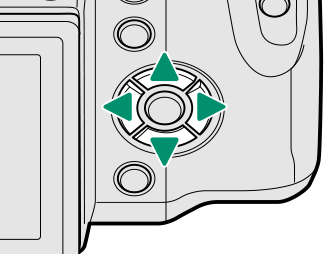
Control Lock
To prevent accidental operation of the selector and the [Q] and [Fn5] buttons during shooting, press [MENU/OK] until X is displayed. The controls can be unlocked by pressing [MENU/OK] until X is no longer displayed.
The Focus Stick
Tilt or press the focus stick to select the focus area.

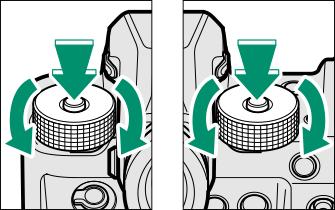
The Shutter Speed and Sensitivity Dials
Press the dial lock release to release the dial before rotating it to the desired setting. Press the release again to lock the dial in place.
| Sensitivity | Shutter speed |
The Command Dials
Rotate or press the command dials to:
|
Rotate |
Choose the desired combination of shutter speed and aperture (program shift) Adjust aperture Adjust sensitivity when is [C] selected with the sensitivity dial View other pictures during playback Select menu tabs or page through menus |
|---|---|
|
Press |
Switch back and forth between aperture and sensitivity when [C] is selected with sensitivity dial. |


|
Rotate |
Choose the desired combination of shutter speed and aperture (program shift) Choose a shutter speed Adjust exposure compensation by pressing the d button and rotating the dial Adjust settings in the quick menu Choose the size of the focus frame Zoom in or out during focus zoom or in full frame or multi-frame playback Highlight menu items |
|---|---|
|
Press |
Perform the function assigned to function button [Fn10] Zoom in on the active focus point during playback Press and hold to choose the manual focus mode focus display |
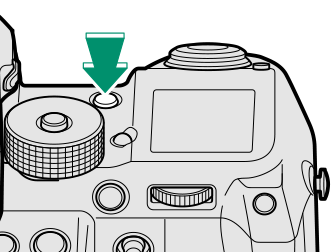
The Drive Button
Pressing the drive button displays the following drive mode options.
| Mode | |
|---|---|
| B | [STILL IMAGE] (single frame) (aTaking Photographs (Mode [P])) |
| I | [CONTINUOUS] (burst mode) (aContinuous Shooting (Burst Mode)) |
| O | [AE BKT] (exposure bracketing) (a[AE BKT]) |
| W | [ISO BKT] (sensitivity bracketing) (a[ISO BKT]) |
| X | [FILM SIMULATION BKT] (film simulation bracketing) (a[FILM SIMULATION BKT]) |
| V | [WHITE BALANCE BKT] (white balance bracketing) (a[WHITE BALANCE BKT]) |
| Y | [DYNAMIC RANGE BKT] (dynamic range bracketing) (a[DYNAMIC RANGE BKT]) |
| Z | [FOCUS BKT] (focus bracketing) (a[FOCUS BKT]) |
| j | [MULTIPLE EXPOSURE] (aMultiple Exposures) |
| F | [MOVIE] (aRecording Movies) |
The Indicator Lamp
When the viewfinder is not in use, camera status is shown by the indicator lamp.
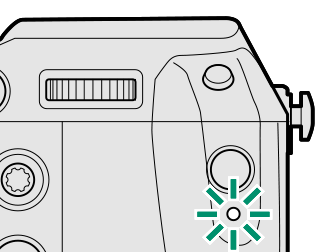
| Indicator lamp | Camera status |
|---|---|
| Glows green | Focus locked. |
| Blinks green | Focus or slow shutter speed warning. Pictures can be taken. |
| Blinks green and orange | Recording pictures. Additional pictures can be taken. |
| Glows orange | Recording pictures. No additional pictures can be taken at this time. |
| Blinks orange | Flash charging; flash will not fire when picture is taken. |
| Blinks red | Lens or memory error. |
Warnings may also appear in the display.
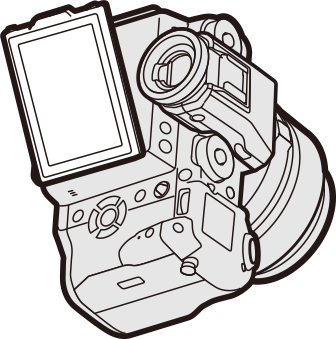
The LCD Monitor
The LCD monitor can be tilted for easier viewing, but be careful not to touch the wires or trap fingers or other objects behind the monitor. Touching the wires could cause camera malfunction.
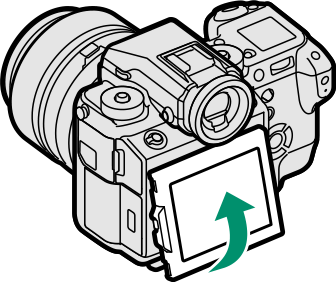
The LCD monitor also functions as a touch screen (aTouch Focus Controls, Playback Touch Controls).
“Tall” (Portrait) Orientation
When the camera is rotated to take pictures in “tall” (Portrait) Orientation (portrait) orientation, you can press the tilt lock release and tilt the display as shown. This is particularly useful when taking pictures from low or high angles.
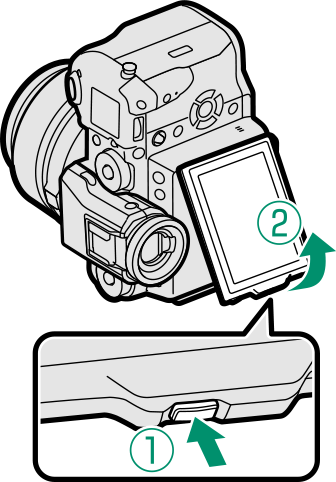
Hold the camera as shown when taking “tall” (Portrait) Orientation (portrait) orientation pictures from high angles.