
 .
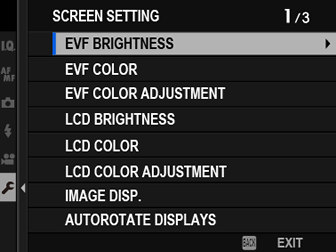
.DThe Setup Menus ([SCREEN SETTING])
Make changes to display settings.
To access display settings, press [MENU]/[OK], select the D ([SET UP]) tab, and choose [SCREEN SET-UP].
[EVF BRIGHTNESS]
Adjust the brightness of the display in the electronic viewfinder.
| Option | Description |
|---|---|
| [AUTO] | Automatic brightness adjustment. |
| [MANUAL] | Adjust brightness manually; choose from options between +5 and −7. |
[EVF COLOR]
Adjust the hue of the display in the electronic viewfinder.
| Options | ||||||||||
|---|---|---|---|---|---|---|---|---|---|---|
| [+5] | [+4] | [+3] | [+2] | [+1] | [0] | [-1] | [-2] | [-3] | [-4] | [-5] |
EVF COLOR ADJUSTMENT
Adjust the color of the display in the electronic viewfinder.
-
Adjust colors using the focus stick (focus lever).
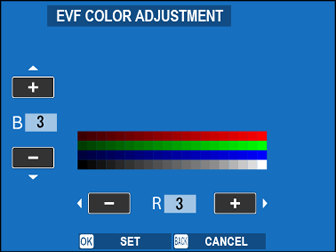
-
Press [MENU]/[OK].
[LCD BRIGHTNESS]
Adjust monitor brightness.
| Options | ||||||||||
|---|---|---|---|---|---|---|---|---|---|---|
| [+5] | [+4] | [+3] | [+2] | [+1] | [0] | [-1] | [-2] | [-3] | [-4] | [-5] |
[LCD COLOR]
Adjust monitor hue.
| Options | ||||||||||
|---|---|---|---|---|---|---|---|---|---|---|
| [+5] | [+4] | [+3] | [+2] | [+1] | [0] | [-1] | [-2] | [-3] | [-4] | [-5] |
[LCD COLOR ADJUSTMENT]
Adjust the color of the display in the LCD monitor.
-
Adjust colors using the focus stick (focus lever).
-
Press [MENU]/[OK].
[IMAGE DISP.]
Choose how long images are displayed after shooting.
| Option | Description |
|---|---|
| [CONTINUOUS] | Pictures are displayed until the [MENU]/[OK] button is pressed or the shutter button is pressed halfway. To zoom in on the active focus point, press the center of the rear command dial; press again to cancel zoom. |
| [1.5 SEC] | Pictures are displayed for the selected time or until the shutter button is pressed halfway. |
| [0.5 SEC] | |
| [OFF] | Pictures are not displayed after shooting. |
Colors may differ slightly from those in the final image.
“Noise” mottling may be visible at high sensitivities.
[AUTOROTATE DISPLAYS]
Choose whether the indicators in the viewfinder and LCD monitor rotate to match camera orientation.
| Options | |
|---|---|
| [ON] | [OFF] |
[PREVIEW EXP./WB IN MANUAL MODE]
Choose whether to enable exposure and/or white balance preview in manual exposure mode.
| Option | Description |
|---|---|
| [PREVIEW EXP./WB] | Enable exposure and white balance preview. |
| [PREVIEW WB] | Preview white balance only. Choose this option in situations in which exposure and white balance are likely to change during shooting, as may be the case when you use a flash with an incandescent monitoring lamp. |
| [OFF] | Disable exposure and white balance preview. Choose this option when using a flash or on other occasions on which exposure may change when the picture is taken. |
[NATURAL LIVE VIEW]
Choose whether the effects of film simulation, white balance, and other settings are visible in the monitor.
| Option | Description |
|---|---|
| [ON] | The effects of camera settings are not visible in the monitor, but shadows in low-contrast, back-lit scenes and other hard-to-see subjects more visible. Colors and tone will differ from those in the final picture. The display will however be adjusted to show the effects of monochrome and sepia settings. |
| [OFF] | The effects of film simulation, white balance, and other settings can be previewed in the monitor. |
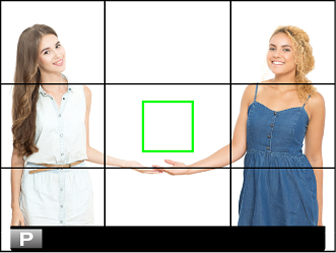
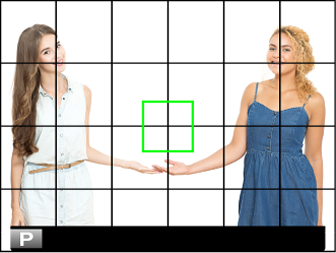
[FRAMING GUIDELINE]
Choose a framing grid for shooting mode.
| Option | |||
|---|---|---|---|
| F[GRID 9] | G[GRID 24] | H[HD FRAMING] | |
| Display | |||
| For “rule of thirds” composition. | A six-by-four grid. | Frame HD pictures in the crop shown by the lines at the top and bottom of the display. | |
Framing guides are not shown at default settings but can be displayed using D[SCREEN SET-UP] > [DISP. CUSTOM SETTING] (a[DISP. CUSTOM SETTING]).
[AUTOROTATE PB]
Choose [ON] to automatically rotate “tall” (portrait-orientation) pictures during playback.
| Options | |
|---|---|
| [ON] | [OFF] |
[FOCUS SCALE UNITS]
Choose the units used for the focus distance indicator.
| Options | |
|---|---|
| [METERS] | [FEET] |
[DUAL DISPLAY SETTING]
Choose the content of the two windows in the dual display.
| Option | Description |
|---|---|
| [R:FOCUS L:FRAME] | The right (small) window shows a close-up of the focus area, while the left (large) window shows the entire frame. |
| [R:FRAME L:FOCUS] | The right (small) window shows the entire frame, while the left (large) window shows a close-up of the focus area. |
[DISP. CUSTOM SETTING]
Choose the items shown in the standard indicator display.
-
In shooting mode, use the [DISP/BACK] button to display standard indicators.
-
Press [MENU]/[OK] and select D[SCREEN SET-UP] > [DISP. CUSTOM SETTING] in the D ([SET UP]) tab.
-
Highlight items and press [MENU]/[OK] to select or deselect.
Item Default [FRAMING GUIDELINE] R [ELECTRONIC LEVEL] R [FOCUS FRAME] R [AF DISTANCE INDICATOR] R [MF DISTANCE INDICATOR] R [HISTOGRAM] R [LIVE VIEW HIGHLIGHT ALERT] R [SHOOTING MODE] R [APERTURE/S-SPEED/ISO] R [INFORMATION BACKGROUND] R [Expo. Comp. (Digit)] R [Expo. Comp. (Scale)] R [FOCUS MODE] R [PHOTOMETRY] R [SHUTTER TYPE] R [FLASH] R [CONTINUOUS MODE] R [DUAL IS MODE] R [TOUCH SCREEN MODE] R [WHITE BALANCE] R [FILM SIMULATION] R [DYNAMIC RANGE] R [BOOST MODE] R [FRAMES REMAINING] R [IMAGE SIZE/QUALITY] R [MOVIE MODE & REC. TIME] R [35mm FORMAT MODE] R [IMAGE TRANSFER ORDER] R [MIC LEVEL] R [GUIDANCE MESSAGE] R [BATTERY LEVEL] R [FRAMING OUTLINE] R -
Press [DISP/BACK] to save changes.
-
Press [DISP/BACK] as needed to exit the menus and return to the shooting display.
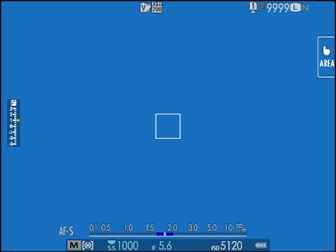
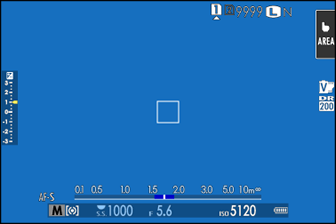
[LARGE INDICATORS MODE(EVF)]
Select [ON] to display large indicators in the electronic viewfinder. The indicators displayed can be selected using D[SCREEN SET-UP] > [LARGE INDICATORS DISP. SETTING].
 |
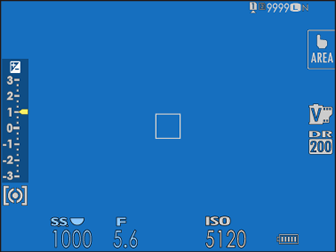 |
| [OFF] | [ON] |
|---|
Some icons are not displayed when [ON] is selected for [LARGE INDICATORS MODE(EVF)] (aThe Electronic Viewfinder).
If [LARGE INDICATORS MODE] is assigned to a function button, the button can be used to toggle [LARGE INDICATORS MODE] on ([ON]) and off ([OFF]) (a[FUNCTION (Fn) SETTING], Assigning Roles to the Function Buttons).
[LARGE INDICATORS MODE(LCD)]
Select [ON] to display large indicators in the LCD monitor. The indicators displayed can be selected using D[SCREEN SET-UP] > [LARGE INDICATORS DISP. SETTING].
 |
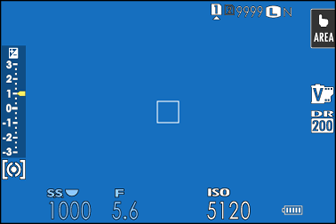 |
| [OFF] | [ON] |
|---|
Some icons are not displayed when [ON] is selected for [LARGE INDICATORS MODE(LCD)] (aThe LCD Monitor).
If [LARGE INDICATORS MODE] is assigned to a function button, the button can be used to toggle [LARGE INDICATORS MODE] on ([ON]) and off ([OFF]) (a[FUNCTION (Fn) SETTING], Assigning Roles to the Function Buttons).
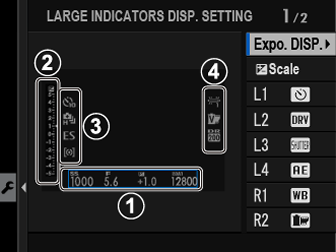
[LARGE INDICATORS DISP. SETTING]
Choose the indicators displayed when [ON] is selected for D[SCREEN SET-UP] > [LARGE INDICATORS MODE(EVF)] or [LARGE INDICATORS MODE(LCD)].
| Option | Description |
|---|---|
|
A[Expo. DISP.] |
Choose the items listed at the bottom of the display. Selected items are indicated by check marks (R); to deselect, highlight the check marks and press [MENU]/[OK]. |
|
Bd[Scale] |
Select [ON] to display the exposure indicator. |
|
C[L1], [L2], [L3], [L4] |
Choose up to four large icons for display on the left side of the screen. |
|
D[R1], [R2], [R3], [R4] |
Choose up to four large icons for display on the right side of the screen. |
[INFORMATION CONTRAST ADJ.]
Adjust display contrast.
| Option | Description |
|---|---|
| [HIGH CONTRAST] | High contrast. |
| [STANDARD] | Normal contrast. |
| [LOW CONTRAST] | Low contrast. |
| [DARK AMBIENT LIGHTING] | Contrast adjusted for dim ambient lighting. |
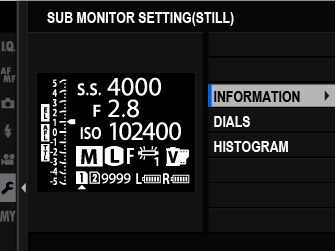
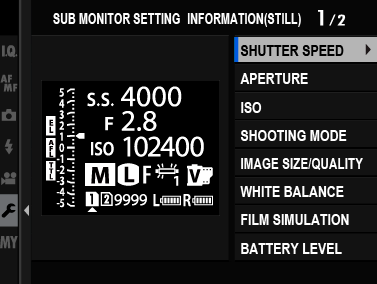
[SUB MONITOR SETTING]
Choose the indicators displayed in the secondary LCD monitor. Separate displays are available for still photography and movie recording. Choose from the following:
| Option | Description |
|---|---|
| [INFORMATION] | Display camera settings. You can choose the settings displayed. |
| [DIALS] | Display dials showing ISO sensitivity and shutter speed. |
| [HISTOGRAM] | Display a histogram. |
You can switch between displays by pressing the secondary LCD monitor mode button.
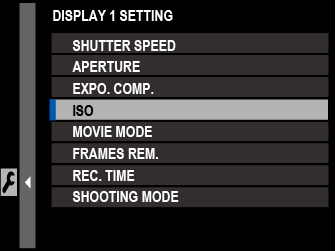
The [INFORMATION] Display
Follow the steps below to choose the indicators shown in the [INFORMATION] display.
-
Select D [SCREEN SET-UP] > [SUB MONITOR SETTING] in the setup menu.
-
Highlight [STILL MODE] or [MOVIE MODE] and press [MENU]/[OK].
-
Highlight [INFORMATION] and press [MENU]/[OK].
-
Highlight the indicator you wish to change and press [MENU]/[OK].
-
Highlight the indicator you wish to display and press [MENU]/[OK].
Choose from:
[SHUTTER SPEED]
[APERTURE]
[EXPO. COMP.]
[ISO]
[MOVIE MODE]
[SHOOTING MODE]
[PHOTOMETRY]
[DRIVE MODE]
[FOCUS MODE]
[WHITE BALANCE]
[IMAGE SIZE/QUALITY]
[SHUTTER TYPE]
[FILM SIMULATION]
[DYNAMIC RANGE]
[35mm FORMAT MODE]
[BOOST MODE]
[DUAL IS MODE]
[SELF-TIMER]
[NONE]
-
Repeat Steps 4 and 5 to change additional indicators.
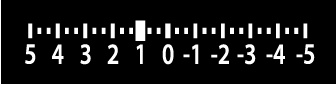
The d [Scale] indicator can only be enabled or disabled.
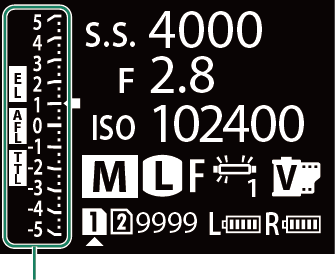
d [Scale]
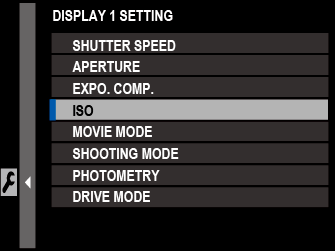
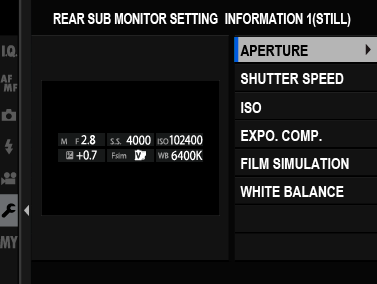
[REAR SUB MONITOR SETTING]
Choose the indicators displayed in the rear secondary monitor. Separate displays are available for still photography and movie recording. Choose from the following:
| Option | Description |
|---|---|
| [INFORMATION 1] | Display a preset selection of indicators ([INFORMATION 1] or [INFORMATION 2]). |
| [INFORMATION 2] | |
d [Scale] |
Display an exposure indicator. |
[HISTOGRAM] |
Display a histogram. |
| [OFF] | Turn the rear secondary monitor off. |

The [INFORMATION 1] and [INFORMATION 2] Displays
Follow the steps below to choose the indicators shown in the [INFORMATION 1] or [INFORMATION 2] display.
-
Select D [SCREEN SET-UP] > [REAR SUB MONITOR SETTING] in the setup menu.
-
Highlight [STILL MODE] or [MOVIE MODE] and press [MENU]/[OK].
-
Highlight [INFORMATION 1] or [INFORMATION 2] and press [MENU]/[OK].
-
Highlight the indicator you wish to change and press [MENU]/[OK].
-
Highlight the indicator you wish to display and press [MENU]/[OK].
Choose from:
[[SHUTTER SPEED]
[APERTURE]
[EXPO. COMP.]
[ISO]
[MOVIE MODE]
[FRAMES REM.]
[REC. TIME]
[SHOOTING MODE]
[PHOTOMETRY]
[DRIVE MODE]
[FOCUS MODE]
[WHITE BALANCE]
[IMAGE SIZE/QUALITY]
[BATTERY LEVEL]
[SHUTTER TYPE]
[FILM SIMULATION]
[DYNAMIC RANGE]
[IMAGE TRANSFER ORDER]
[35mm FORMAT MODE]
[H.265(HEVC)/H.264]
[MOVIE COMPRESSION]
[HIGHLIGHT TONE]
[SHADOW TONE]
[COLOR]
[SHARPNESS]
[NOISE REDUCTION]
[GRAIN EFFECT]
[COLOR CHROME EFFECT]
[COLOR CHROME FX BLUE]
[SMOOTH SKIN EFFECT]
[BOOST MODE]
[DUAL IS MODE]
[FLASH]
[SELF-TIMER]
[NONE]
-
Repeat Steps 4 and 5 to change additional indicators.
[SUB MONITOR BACKGROUND COLOR]
Adjusting the background color of the secondary LCD monitor according to lighting conditions makes the display easier to read.
| Option | Description |
|---|---|
| [BLACK] | Recommended for use with dark ambient lighting. |
| [WHITE] | Recommended for use with bright ambient lighting. |
The background is displayed in white when the secondary LCD monitor backlight is on.
[REAR SUB MONITOR BRIGHTNESS]
Adjust the brightness of the rear secondary monitor.
| Options | ||||||||||
|---|---|---|---|---|---|---|---|---|---|---|
| [+5] | [+4] | [+3] | [+2] | [+1] | [0] | [-1] | [-2] | [-3] | [-4] | [-5] |


