.
.Camera Displays
During shooting, the viewfinder (EVF) and LCD monitor can function either as standard or touch menu displays.
For illustrative purposes, displays are shown with all indicators lit.
- The Standard Shooting Display
- The Touch Menu Display
- Choosing a Display Mode
- Adjusting Display Brightness
- Display Rotation
- The DISP/BACK Button
- Customizing the Standard Display
The Standard Shooting Display
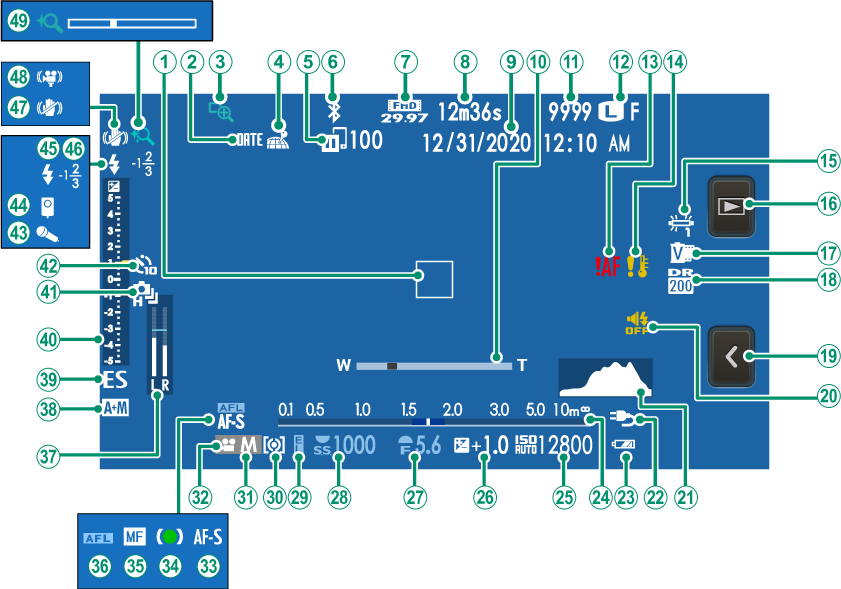
Icons that are displayed in both the electronic viewfinder (EVF) and LCD monitor have the same meaning in both displays.
AFocus frame
BDate stamp
CFocus check
DLocation data download status
EImage transfer status
FBluetooth ON/OFF
GMovie mode
HTime remaining
IDate and time
JPower zoom indicator
KNumber of available frames 1
LImage size
Image quality
MFocus warning
NTemperature warning
OWhite balance
PPlayback mode button 2
QFilm simulation
RDynamic range
STouch menu button 3
TSound and flash indicator
UHistogram
VExternal power source in use
WBattery level
XDistance indicator 5
YSensitivity
ZExposure compensation
aAperture
bShutter speed
cAE lock
dMetering
eShooting mode
fMovie mode
gFocus mode 5
hFocus indicator 5
iManual focus indicator 5
jAF lock
kRecording level
lAF+MF indicator 5
mShutter type
nExposure indicator
oContinuous mode
pSelf-timer indicator
qMicrophone
rRemote release
sFlash mode
tFlash compensation
uIS mode 5
vDigital gimbal
wTouch zoom 4
1 Shows “9999” if there is space for over 9999 frames.
2 Tap to start playback when shooting in self-portrait (“selfie”) mode.
3 Tap to switch to the touch menu display (aThe Touch Menu Display).
4 Adjust digital zoom settings.
5 Not displayed when ON is selected for DSCREEN SET-UP > LARGE INDICATORS MODE (EVF) or LARGE INDICATORS MODE (LCD).
The camera shows “External power source in use” in place of the battery level when a DC coupler is connected (aINTERVAL TIMER SHOOTING).
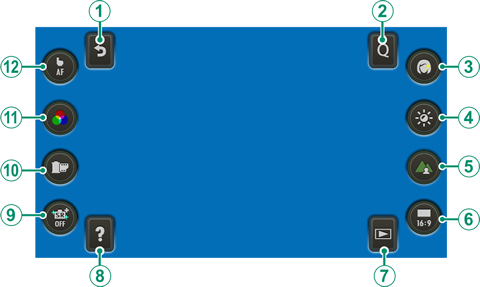
The Touch Menu Display
Select the touch menu display to use touch controls.
| Touch control | Description |
|---|---|
|
ABack |
Return to standard shooting mode (aThe Standard Shooting Display). |
|
BQ menu |
View the options assigned to the Q menu (aThe Quick Menu). |
|
CPortrait enhancer Lv |
Choose the portrait enhancement level (aPORTRAIT ENHANCER LV). |
|
DExposure compensation |
Adjust exposure (aExposure Compensation). |
|
EDepth control |
Adjust depth of field. |
|
FImage aspect |
Choose the aspect ratio for new pictures. |
|
GPlayback mode |
Switch to playback mode (aViewing Pictures). |
|
HHelp |
View function button help. |
|
IBright mode |
Turn bright mode on or off. |
|
JT.B. Fn2 |
View the options assigned to the function buttons using DBUTTON/DIAL SETTING > FUNCTION (Fn) SETTING (aTouch Function Buttons). |
|
KT.B. Fn1 |
|
|
LTouch screen mode |
Choose a touch-screen mode from TOUCH SHOOTING, AF, AREA, and OFF (aShooting Touch Controls). |
Tap the “image aspect” icon (F) to choose from aspect ratios of 16 : 9, 1 : 1, 4 : 3, and 3 : 2.
Icons that are displayed in both the electronic viewfinder (EVF) and LCD monitor have the same meaning in both displays.
The touch menu can also be navigated using the focus stick (focus lever).
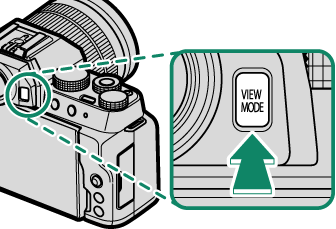
Choosing a Display Mode
Press the VIEW MODE button to cycle through the following display modes.
| Option | Description |
|---|---|
| E EYE SENSOR | Putting your eye to the viewfinder turns the viewfinder on and the LCD monitor off; taking your eye away turns the viewfinder off and LCD monitor on. |
| EVF ONLY | Viewfinder on, LCD monitor off. |
| LCD ONLY | LCD monitor on, viewfinder off. |
| EVF ONLY + E | Putting your eye to the viewfinder turns the viewfinder on; taking it away turns the viewfinder off. The LCD monitor remains off. |
| E EYE SENSOR + LCD IMAGE DISP. | Putting your eye to the viewfinder during shooting turns the viewfinder on, but the LCD monitor is used for the display of images once you remove your eye from the viewfinder after shooting. |
The Eye Sensor
The eye sensor may respond to objects other than your eye or to light shining directly on the sensor.
The eye sensor is disabled when the display in the monitor is reversed (a The Self-Portrait Display).
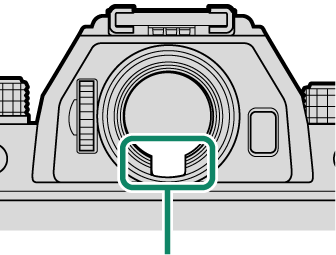
Eye sensor
Adjusting Display Brightness
The brightness and hue of the viewfinder and LCD monitor can be adjusted using the items in the DSCREEN SET-UP menu. Choose EVF BRIGHTNESS or EVF COLOR to adjust viewfinder brightness or hue, LCD BRIGHTNESS or LCD COLOR to do the same for the LCD monitor.
Holding the DISP/BACK button during shooting sets LCD BRIGHTNESS to +5 and displays LCD BRIGHTNESS options.
Display Rotation
When ON is selected for DSCREEN SET-UP > AUTOROTATE DISPLAYS, the indicators in the viewfinder and LCD monitor automatically rotate to match camera orientation.
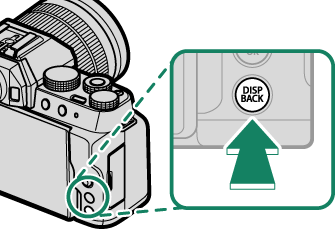
The DISP/BACK Button
Press DISP/BACK to cycle through display modes as follows.
Indicators for the EVF and LCD must be selected separately. To choose the EVF display, place your eye to the viewfinder while using the DISP/BACK button.
Viewfinder
| Standard | Information off |

LCD Monitor
| Standard | Information off |
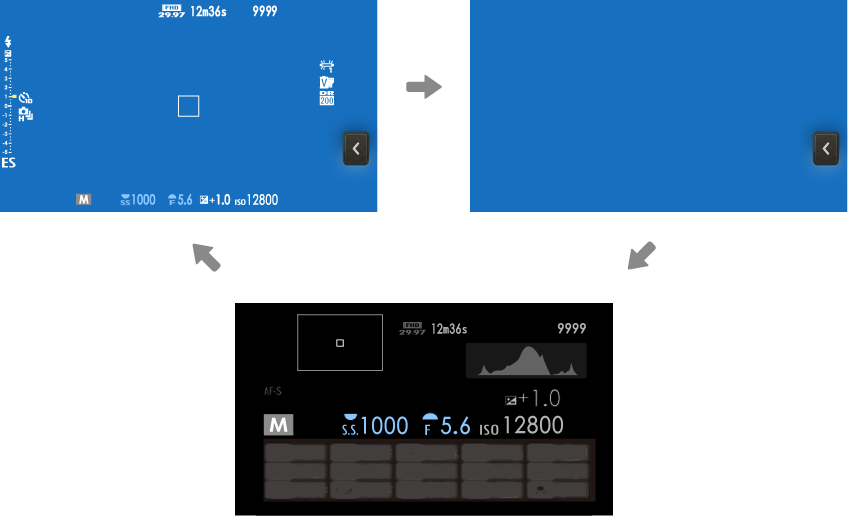
Info display
Customizing the Standard Display
To choose the items shown in the standard display:
-
Display standard indicators.
Use the DISP/BACK button to display standard indicators.
-
Select DISP. CUSTOM SETTING.
Select DSCREEN SET-UP > DISP. CUSTOM SETTING in the setup menu.
-
Choose items.
Highlight items and press MENU/OK to select or deselect.
Item Default FRAMING GUIDELINE R ELECTRONIC LEVEL R FOCUS FRAME R AF DISTANCE INDICATOR R MF DISTANCE INDICATOR R HISTOGRAM R SHOOTING MODE R APERTURE/S-SPEED/ISO R INFORMATION BACKGROUND R Expo. Comp. (Digit) R Expo. Comp. (Scale) R FOCUS MODE R PHOTOMETRY R SHUTTER TYPE R FLASH R CONTINUOUS MODE R DUAL IS MODE R WHITE BALANCE R FILM SIMULATION R DYNAMIC RANGE R FRAMES REMAINING R IMAGE SIZE/QUALITY R MOVIE MODE & REC. TIME R IMAGE TRANSFER ORDER R MIC LEVEL R BATTERY LEVEL R -
Save changes.
Press DISP/BACK to save changes.
-
Exit the menus.
Press DISP/BACK as needed to exit the menus and return to the shooting display.
Virtual Horizon
Selecting ELECTRONIC LEVEL displays a virtual horizon. The camera is level when the two lines overlap. Note that the virtual horizon may not be displayed if the camera lens is pointed up or down.

Histograms
Histograms show the distribution of tones in the image. Brightness is shown by the horizontal axis, the number of pixels by the vertical axis.
|
Number of pixels
|
 |
|
Shadows |
Pixel brightness |  Highlights Highlights |


Optimal exposure: Pixels are distributed in an even curve throughout the tone range.
Overexposed: Pixels are clustered on the right side of the graph.

Underexposed: Pixels are clustered on the left side of the graph.