
 .
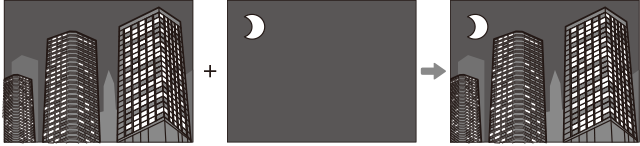
.Multiple Exposures
Create a photograph that combines multiple exposures.
-
Rotate the drive dial to j (Multiple exposure).

-
Choose a blend mode using A[SHOOTING SETTING] > [DRIVE SETTING] > [MULTIPLE EXPOSURE CTRL].
Option Description [ADDITIVE] The camera adds the exposures together. You may need to lower exposure compensation depending on the number of shots. [AVERAGE] The camera automatically optimizes exposure for the final picture. The background in series shot without changing the composition will be optimally exposed. [LIGHT] The camera compares the exposures and chooses only the brightest pixel at each location. Colors may be mixed depending on their brightness and hue. [DARK] The camera compares the exposures and chooses only the darkest pixel at each location. Colors may be mixed depending on their brightness and hue. -
Take the first shot.
-
Press [MENU/OK]. The first shot will be shown superimposed on the view through the lens and you will be prompted to take the second shot.
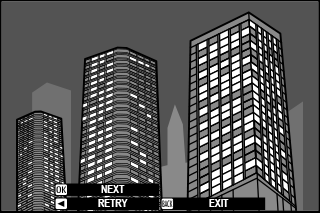
To return to the previous step and retake the first shot, press the focus stick (focus lever) left.
To save the first shot and exit without creating a multiple exposure, press [DISP/BACK].
-
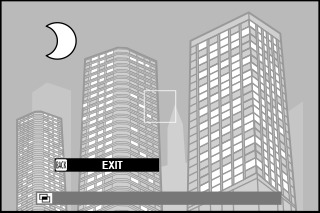
Take the second shot, using the first frame as a guide.
-
Press [MENU/OK].
The combined exposures will be displayed as a guide to composing the next shot.
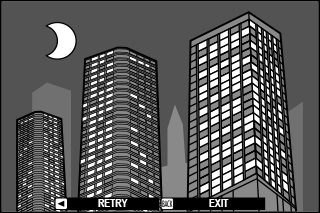
To return to the previous step and retake the second shot, press the focus stick left.
To end shooting and create a multiple exposure from the shots taken to this point, press [DISP/BACK].
-
Make additional exposures.
Each photograph can contain up to nine exposures.
-
Press [DISP/BACK] to end shooting.
The camera will create the combined image and multiple exposure shooting will end.


