
 .
.The Shooting Menus (IMAGE QUALITY SETTING)
Adjust image quality settings.
To display image quality settings, press MENU/OK in the shooting display and select the H(IMAGE QUALITY SETTING) tab.
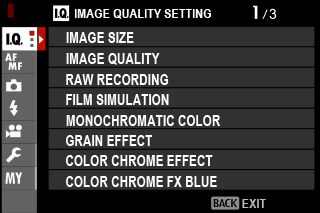
The options available vary with the shooting mode selected.
IMAGE SIZE
Choose the size and aspect ratio at which still pictures are recorded.
| Option | Image size |
|---|---|
| O3:2 | 6240 × 4160 |
| O16:9 | 6240 × 3512 |
| O1:1 | 4160 × 4160 |
| Option | Image size |
|---|---|
| P3:2 | 4416 × 2944 |
| P16:9 | 4416 × 2488 |
| P1:1 | 2944 × 2944 |
| Option | Image size |
|---|---|
| Q3:2 | 3120 × 2080 |
| Q16:9 | 3120 × 1760 |
| Q1:1 | 2080 × 2080 |
The following options are available in SPORTS FINDER MODE and when 1.25X CROP is selected in burst mode:
| Option | Image size |
|---|---|
| P3:2 | 4992 × 3328 |
| P16:9 | 4992 × 2808 |
| P1:1 | 3328 × 3328 |
IMAGE SIZE is not reset when the camera is turned off or another shooting mode is selected.
IMAGE QUALITY
Choose a file format and compression ratio.
| Option | Description |
|---|---|
| FINE | Low compression ratios are used for higher-quality images. |
| NORMAL | Higher compression ratios are used to increase the number of images that can be stored. |
| FINE + RAW | Record both RAW and fine-quality JPEG images. |
| NORMAL + RAW | Record both RAW and normal-quality JPEG images. |
| RAW | Record RAW images only. |
The Function Buttons
To toggle RAW image quality on or off for a single shot, assign RAW to a function button (aAssigning Roles to the Function Buttons). Press the button once to select the option in the right column, again to return to the original setting (left column).
| Option currently selected for IMAGE QUALITY | Option selected by pressing function button to which RAW is assigned |
|---|---|
| FINE | FINE + RAW |
| NORMAL | NORMAL + RAW |
| FINE + RAW | FINE |
| NORMAL + RAW | NORMAL |
| RAW | FINE |
RAW RECORDING
Choose whether to compress RAW images.
| Option | Description |
|---|---|
| UNCOMPRESSED | RAW images are not compressed. |
| LOSSLESS COMPRESSED | RAW images are compressed using a reversible algorithm that reduces file size with no loss of image data. The images can be viewed in Capture One Express Fujifilm, RAW FILE CONVERTER EX powered by SILKYPIX, FUJIFILM X RAW STUDIO, or other software that supports “lossless” RAW compression. |
FILM SIMULATION
Simulate the effects of different kinds of film, including black-and-white (with or without color filters). Choose a palette according to your subject and creative intent.
| Option | Description |
|---|---|
| c PROVIA/STANDARD |
Ideal for a wide range of subjects. |
| d Velvia/VIVID |
Vibrant reproduction, ideal for landscape and nature. |
| e ASTIA/SOFT |
Softer color and contrast for a more subdued look. |
| i CLASSIC CHROME |
Soft color and enhanced shadow contrast for a calm look. |
| g PRO Neg. Hi |
Ideal for portrait with slightly enhanced contrast. |
| h PRO Neg. Std |
Ideal for portrait with soft gradations and skin tones. |
| g CLASSIC Neg. |
Enhanced color with hard tonality to increase image depth. |
| X ETERNA/CINEMA |
Soft color and rich shadow tone suitable for film look movie. |
| a ACROS |
Shoot in Black and White In rich details with sharpness. Available with yellow (Ye), red (R), and green (G) filters, which deepen shades of gray corresponding to hues complementary to the selected color.
|
| b MONOCHROME |
Shoots in black and white. Available with yellow (Ye), red (R), and green (G) filters, which deepen shades of gray corresponding to hues complementary to the selected color.
|
| f SEPIA |
Shoots in sepia tone. |
Film simulation options can be combined with tone and sharpness settings.
For more information, visit:
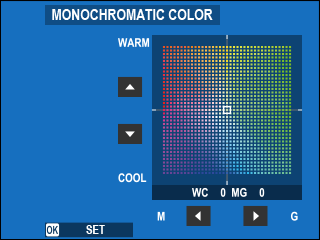
MONOCHROMATIC COLOR
Add a reddish or bluish tinge (warm or cool color cast) to the aACROS and bMONOCHROME monochrome film simulations. Color can be adjusted on the WARM–COOL and G (Green)–M (Magenta) axes.
GRAIN EFFECT
Add a film grain effect.
ROUGHNESS
| Option | Description |
|---|---|
| STRONG | Choose for rougher grains. |
| WEAK | Choose for smoother grains. |
| OFF | Turn the effect off. |
SIZE
| Option | Description |
|---|---|
| LARGE | Choose for coarser grains. |
| SMALL | Choose for finer grains. |
COLOR CHROME EFFECT
Increase the range of tones available for rendering colors that tend to be highly saturated, such as reds, yellows, and greens.
| Option | Description |
|---|---|
| STRONG | Choose for a strong effect. |
| WEAK | Choose for a weak effect. |
| OFF | Turn the effect off. |
COLOR CHROME FX BLUE
Increase the range of tones available for rendering blues.
| Option | Description |
|---|---|
| STRONG | Choose for a strong effect. |
| WEAK | Choose for a weak effect. |
| OFF | Turn the effect off. |
WHITE BALANCE
For natural colors, choose a white balance option that matches the light source.
| Option | Description |
|---|---|
| AUTO | White balance is adjusted automatically. |
| k/l/m | Measure a value for white balance. |
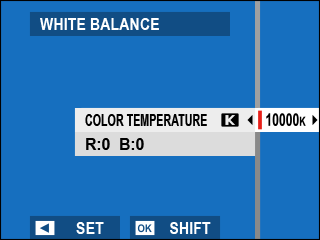
| k | Choose a color temperature. |
| i | For subjects in direct sunlight. |
| j | For subjects in the shade. |
| k | Use under “daylight” fluorescent lights. |
| l | Use under “warm white” fluorescent lights. |
| m | Use under “cool white” fluorescent lights. |
| n | Use under incandescent lighting. |
| g | Reduces the blue cast typically associated with underwater lighting. |
In conditions in which AUTO fails to produce the desired results—for example, under certain types of lighting or in close-ups of portrait subjects—use custom white balance or choose a white balance option suited to the light source.
White balance is adjusted for flash lighting only in AUTO and gmodes. Turn the flash off using other white balance options.
White balance options can also be accessed via shortcuts (aShortcut Options).
Fine-Tuning White Balance
Pressing MENU/OK after selecting a white balance option displays a fine-tuning dialog; use the focus stick (focus lever) to fine-tune white balance.
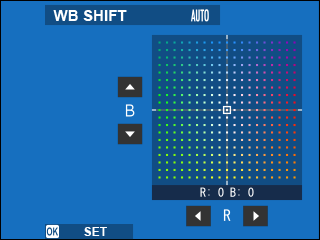
To exit without fine-tuning white balance, press DISP/BACK after selecting a white balance option.
The focus stick (focus lever) does not tilt diagonally.
Custom White Balance
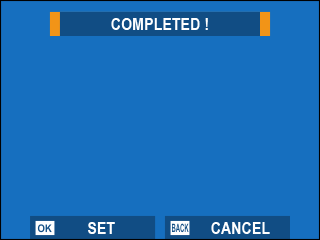
Choose k, l, or m to adjust white balance for unusual lighting conditions using a white object as a reference (colored objects can also be used to lend photos a color cast). A white balance target will be displayed; position and size the target so that it is filled by the reference object and press the shutter button all the way down to measure white balance (to select the most recent custom value and exit without measuring white balance, press DISP/BACK, or press MENU/OK to select the most recent value and display the fine-tuning dialog).
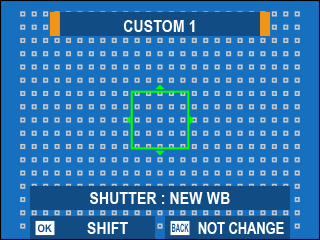
If “COMPLETED !” is displayed, press MENU/OK to set white balance to the measured value.
- If “UNDER” is displayed, raise exposure compensation and try again.
- If “OVER” is displayed, lower exposure compensation and try again.
kColor Temperature
Changing the color temperature changes overall hue.
Color temperature can be adjusted to make pictures “warmer” or “colder” or deliberately produce colors that differ radically from those in real life.
-
Select k in the white balance menu. A list of color temperatures will be displayed.
-
Highlight a color temperature using the focus stick (focus lever) and press MENU/OK.
A fine-tuning dialog will be displayed.
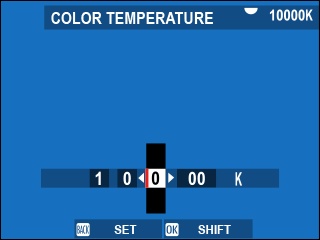
You can also adjust color temperature in increments of 10 K by rotating the rear command dial.
To exit without fine-tuning white balance, press DISP/BACK after choosing a color temperature.
-
Highlight a fine-tuning amount using the focus stick.
-
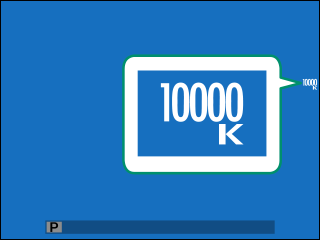
Press MENU/OK.
The changes will be applied. The selected color temperature will appear in the display.
Color Temperature
Color temperature is an objective measure of the color of a light source, expressed in Kelvin (K). Light sources with a color temperature close to that of direct sunlight appear white; light sources with a lower color temperature have a yellow or red cast, while those with a higher color temperature are tinged with blue.
DYNAMIC RANGE
Control contrast. Choose lower values to increase contrast when shooting indoors or under overcast skies, higher values to reduce loss of detail in highlights when photographing high-contrast scenes. Higher values are recommended for scenes that include both sunlight and deep shade, for such high-contrast subjects as sunlight on water, brightly-lit autumn leaves, and portraits taken against a blue sky, and for white objects or people wearing white.
| Options | |||
|---|---|---|---|
| AUTO | V100% | W200% | X400% |
Mottling may appear in pictures taken at higher values. Choose a value according to the scene.
If AUTO is selected, the camera will automatically choose either V100% or W200% according to the subject and shooting conditions. Shutter speed and aperture will be displayed when the shutter button is pressed halfway.
W200% is available at sensitivities of from ISO 320 to ISO 12800, X400% at sensitivities of from ISO 640 to 12800.
D RANGE PRIORITY
Reduce loss of detail in highlights and shadows for natural-looking results when photographing high-contrast scenes.
| Option | Description |
|---|---|
| AUTO | Contrast is adjusted automatically in response to lighting conditions. |
| STRONG | Adjust dynamic range by a large amount for very high-contrast scenes. |
| WEAK | Adjust dynamic range by a smaller amount for moderately high-contrast scenes. |
| OFF | Contrast reduction off. |
WEAK is available at sensitivities of from ISO 320 to ISO 12800, STRONG at sensitivities of from ISO 640 to 12800.
When an option other than OFF is selected, HIGHLIGHT TONE, SHADOW TONE, and DYNAMIC RANGE will be adjusted automatically; if you wish to adjust these settings manually, choose OFF.
TONE CURVE
With reference to a tone curve, use the focus stick (focus lever) to adjust the appearance of highlights or shadows, making them harsher or softer. Choose higher values to make shadows and highlights harsher, lower values to make them softer.
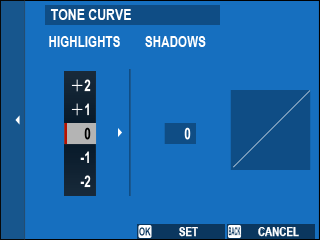
| Options | ||||||
|---|---|---|---|---|---|---|
| -2 | -1 | 0 | +1 | +2 | +3 | +4 |
COLOR
Adjust color density. Choose higher values to increase saturation, lower values to reduce it.
| Options | ||||||||
|---|---|---|---|---|---|---|---|---|
| -4 | -3 | -2 | -1 | 0 | +1 | +2 | +3 | +4 |
SHARPNESS
Sharpen or soften outlines. Choose higher values for sharper outlines, lower values for softer outlines.
| Options | ||||||||
|---|---|---|---|---|---|---|---|---|
| -4 | -3 | -2 | -1 | 0 | +1 | +2 | +3 | +4 |
NOISE REDUCTION
Reduce noise in pictures taken at high sensitivities. Choose higher values to reduce noise and smooth outlines, lower values to leave outlines visible.
| Options | ||||||||
|---|---|---|---|---|---|---|---|---|
| -4 | -3 | -2 | -1 | 0 | +1 | +2 | +3 | +4 |
CLARITY
Increase definition while altering tones in highlights and shadows as little as possible. Choose higher values for increased definition, lower values for a softer effect.
| Options | ||||||||||
|---|---|---|---|---|---|---|---|---|---|---|
| -5 | -4 | -3 | -2 | -1 | 0 | +1 | +2 | +3 | +4 | +5 |
LONG EXPOSURE NR
Select ON to reduce mottling in long time-exposures.
| Options | |
|---|---|
| ON | OFF |
COLOR SPACE
Choose the gamut of colors available for color reproduction.
| Option | Description |
|---|---|
| sRGB | Recommended in most situations. |
| Adobe RGB | For commercial printing. |
PIXEL MAPPING
Use this option if you notice bright spots in your pictures.
-
Press MENU/OK in the shooting display and select the HIMAGE QUALITY SETTING tab.
-
Highlight PIXEL MAPPING and press MENU/OK to perform pixel mapping.
Results are not guaranteed.
Be sure the battery is fully charged before beginning pixel mapping.
Pixel mapping is not available when the camera temperature is elevated.
Processing may take a few seconds.
SELECT CUSTOM SETTING
Settings can be recalled from any of the seven custom settings banks.
| Banks | ||
|---|---|---|
| CUSTOM 1 | CUSTOM 2 | CUSTOM 3 |
| CUSTOM 4 | CUSTOM 5 | CUSTOM 6 |
| CUSTOM 7 | ||
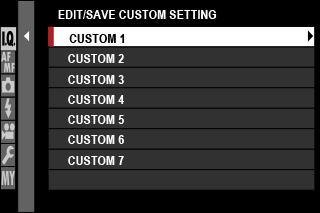
EDIT/SAVE CUSTOM SETTING
Save up to 7 sets of custom camera settings for commonly-encountered situations. Saved settings can be recalled using HIMAGE QUALITY SETTING > SELECT CUSTOM SETTING.
-
Select HIMAGE QUALITY SETTING in the shooting menu, then highlight EDIT/SAVE CUSTOM SETTING and press MENU/OK.
-
Highlight a custom settings bank and press MENU/OK to select.
-
Highlight EDIT and press MENU/OK. A list of shooting menu options will be displayed.
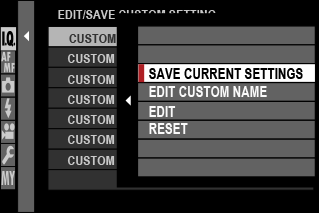
To store current camera settings in the selected bank, highlight SAVE CURRENT SETTINGS and press MENU/OK.
To restore default settings for the current bank, select RESET.
Banks can be renamed using EDIT CUSTOM NAME.
-
Highlight an item you wish to store in the custom settings bank and press MENU/OK.
Adjust settings for the selected item.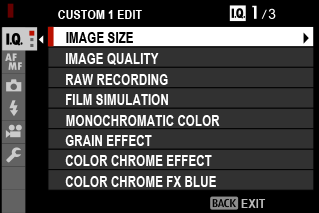
-
Press MENU/OK to save changes to the selected item and return to the menu item list.
Adjust additional items as desired. -
Pressing DISP/BACK in the menu item list displays a confirmation dialog. Highlight OK and press MENU/OK to save the settings to the selected bank.


