
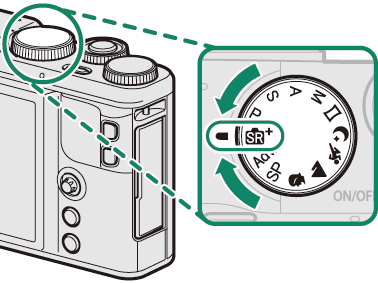
Choose a shooting mode according to the scene or type of subject.
When the mode dial is rotated to S, the camera automatically optimizes settings to suit the scene.
![]()
The camera automatically selects the appropriate scene.

| Scene |
|---|
| AUTO |
| PORTRAIT |
| LANDSCAPE |
| NIGHT |
| Scene |
|---|
| MACRO |
| NIGHT PORTRAIT |
| BACKLIT PORTRAIT |
The mode selected may vary with shooting conditions. If the mode and subject do not match, select mode P or choose SP and select a scene manually.
Subjects detected by the camera are indicated by green frames; press the shutter button halfway to focus on the subject in the frame.
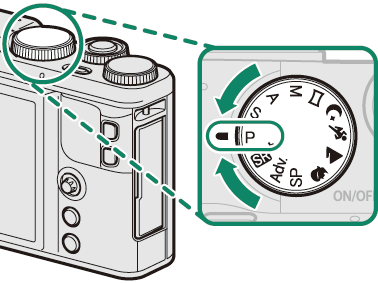
Let the camera choose shutter speed and aperture for optimal exposure. Other values that produce the same exposure can be selected with program shift.
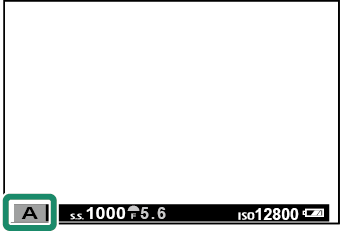
Rotate the mode dial to P.
![]()
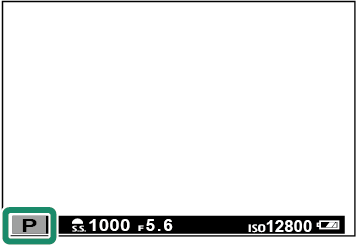
P will appear in the display.
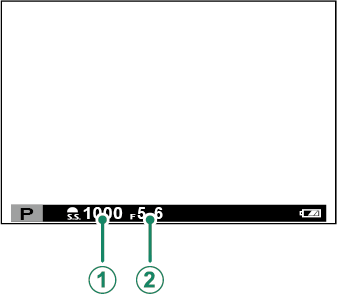
Program Shift
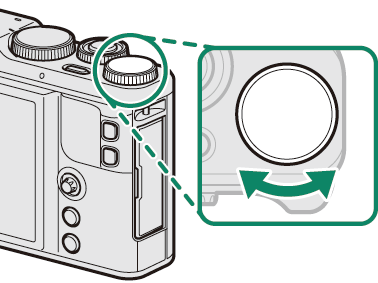
Rotate the front command dial to choose the desired combination of shutter speed and aperture (program shift).
 Shutter speed
 Aperture
Program shift is not available if:
To cancel program shift, turn the camera off.
Choose a shutter speed and let the camera adjust aperture for optimal exposure.
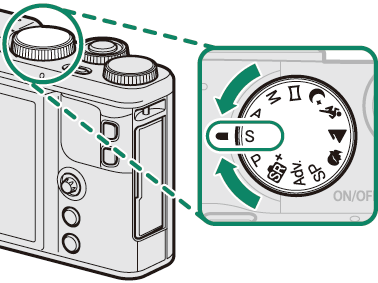
Rotate the mode dial to S.
![]()
S will appear in the display.
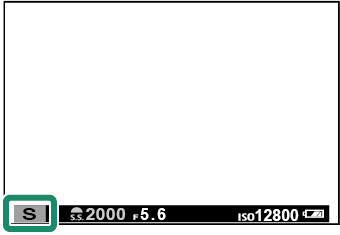
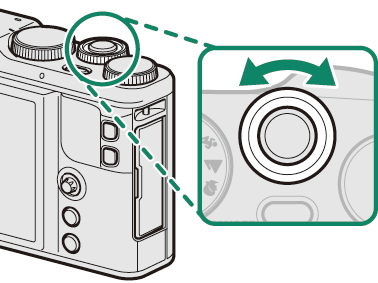
Use the front command dial to choose a shutter speed.
If the correct exposure cannot be achieved at the selected shutter speed, aperture will be displayed in red.
Long Time-Exposures
A count-down timer is displayed during long time-exposures.
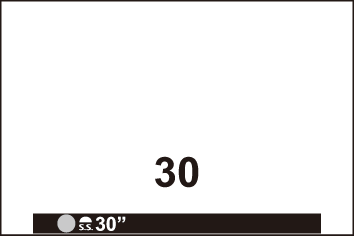
Use of a tripod is recommended to prevent blur caused by the camera moving during the exposure.
To reduce “noise” (mottling) in long time-exposures, select ON for KLONG EXPOSURE NR. Note that this may increase the time needed to record images after shooting.
You may it helpful to use a remote release for long time-exposures (a Using a Remote Release).
Choose an aperture and let the camera adjust shutter speed for optimal exposure.
Rotate the mode dial to A.

![]()
A will appear in the display.
Use the front command dial to choose an aperture.
If the correct exposure cannot be achieved at the selected aperture, shutter speed will be displayed in red.
Previewing Depth of Field
When PREVIEW DEPTH OF FIELD is assigned to a function button, pressing the button displays a L icon and stops aperture down to the selected setting, allowing depth of field to be previewed when the view through the lens appears in the display.

Alter exposure from that selected by the camera.
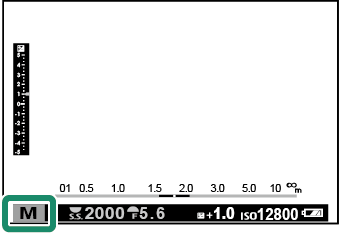
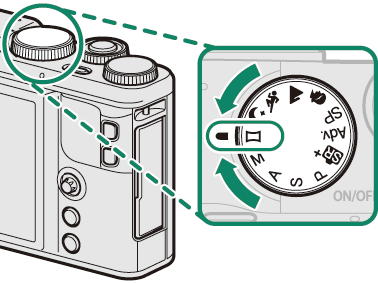
Rotate the mode dial to M.

![]()
M will appear in the display.
Rotate the rear command dial to choose a shutter speed and the front command dial to choose the aperture.
The manual exposure display includes an exposure indicator that shows the amount the picture would be under or over-exposed at current settings.
Shutter speed
Aperture
Exposure Preview
To preview exposure in the LCD monitor, select ON for ASCREEN SET-UP > PREVIEW EXP. IN MANUAL MODE. Select OFF when using the flash or on other occasions on which exposure may change when the picture is taken.
![]()
For bulb photography, rotate the rear command dial to select a shutter speed of BULB.
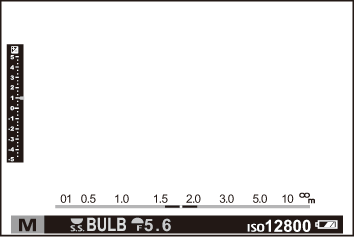
Use of a tripod is recommended to prevent blur caused by the camera moving during the exposure.
The shutter will remain open for up to 60 minutes, or for 1 second when the electronic shutter is used.
A count-down timer will be displayed while the exposure is in progress.
To reduce “noise” (mottling) in long time-exposures, select ON for KLONG EXPOSURE NR. Note that this may increase the time needed to record images after shooting.
You may it helpful to use a remote release for long time-exposures (a Using a Remote Release).
Follow an on-screen guide to create a panorama.
Rotate the mode dial to u (PANORAMA).
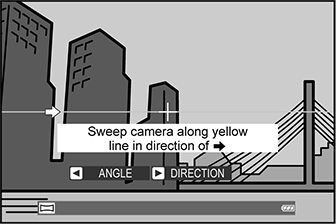
To select the size of the angle through which you will pan the camera while shooting, press the focus stick (focus lever) left. Highlight a size and press MENU/OK.
Press the focus stick right to view a choice of pan directions. Highlight a pan direction and press MENU/OK.
Press the shutter button all the way down to start recording. There is no need to keep the shutter button pressed during recording.
Pan the camera in the direction shown by the arrow. Shooting ends automatically when the camera is panned to the end of the guides and the panorama is complete.
For Best Results
Prop your elbows against your sides and move the camera slowly in a small circle at a steady speed, keeping the camera parallel or at right angles to the horizon and being careful only to pan in the direction shown by the guides. Use a tripod for best results. If the desired results are not achieved, try panning at a different speed.
Shooting ends if the shutter button is pressed all the way down during shooting. No panorama may be recorded if the shutter button is pressed before the panorama is complete.
Panoramas are created from multiple frames; exposure for the entire panorama is determined by the first frame. The camera may in some cases record an greater or lesser angle than selected or be unable to stitch the frames together perfectly. The last part of the panorama may not be recorded if shooting ends before the panorama is complete.
Shooting may be interrupted if the camera is panned too quickly or too slowly. Panning the camera in a direction other than that shown cancels shooting.
The desired results may not be achieved with moving subjects, subjects close to the camera, unvarying subjects such as the sky or a field of grass, subjects that are in constant motion, such as waves and waterfalls, or subjects that undergo marked changes in brightness. Panoramas may be blurred if the subject is poorly lit.
Viewing Panoramas
In full-frame playback, you can use the rear command dial to zoom panoramas in or out. Alternatively, you can play the panorama back using the focus stick (focus lever).
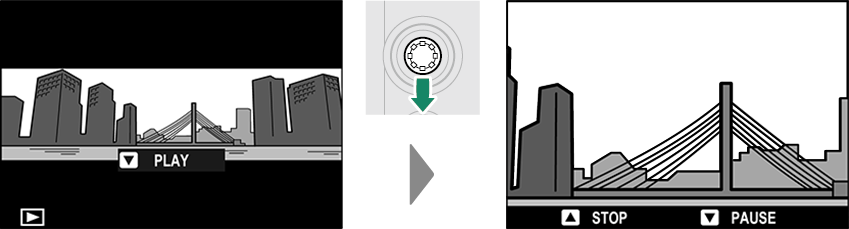
Press the focus stick down to start playback and press again to pause. Press the focus stick left or right to change the pan direction while playback is in progress or to scroll the panorama while playback is paused; vertical panoramas will scroll vertically, horizontal panoramas horizontally. To exit to full-frame playback, press the focus stick up.
The camera offers a choice of “scenes,” each adapted to particular shooting conditions or a specific type of subject.
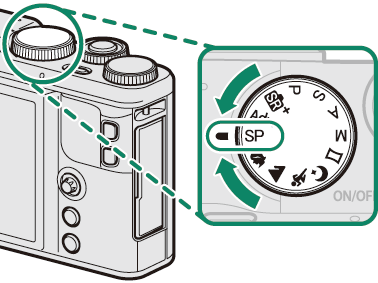
Rotate the mode dial to SP (SCENE POSITION).
The following scenes can be selected directly using the mode dial:
| Scene | Description |
|---|---|
| hPORTRAIT ENHANCER (Z) | Choose for a smooth skin effect when shooting portraits. If ON is selected for KTOUCH SCREEN SETTING, you can choose the portrait enhancement level using touch controls. |
| MLANDSCAPE | Choose for daylight shots of buildings and landscapes. |
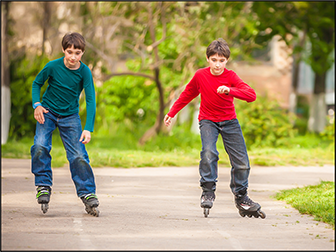
| NSPORT | Choose when photographing moving subjects. |
| ONIGHT | Choose for poorly lit twilight or night scenes. |
Press MENU/OK to display the shooting menu and select ASCENE POSITION.
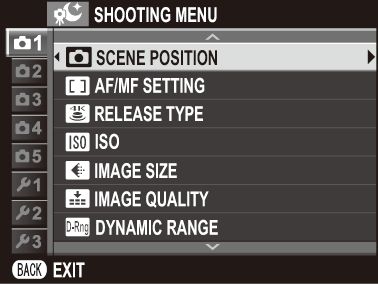
A menu of scene mode options will be displayed.
Scene mode options can also be displayed by tapping the scene position icon in the shooting display.
Highlight one of the following options and press MENU/OK.
| Scene | Description |
|---|---|
| hPORTRAIT | Choose for portraits. |
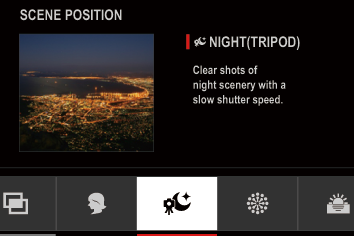
| HNIGHT (TRIPOD) | Choose this mode for slow shutter speeds when shooting at night. |
| pFIREWORKS | Slow shutter speeds are used to capture the expanding burst of light from a firework. |
| QSUNSET | Choose this mode to record the vivid colors in sunrises and sunsets. |
| RSNOW | Choose for crisp, clear shots that capture the brightness of scenes dominated by shining white snow. |
| sBEACH | Choose for crisp, clear shots that capture the brightness of sunlit beaches. |
| UPARTY | Capture indoor background lighting under low-light conditions. |
| VFLOWER | Effective for taking more vivid shots of flowers. |
| WTEXT | Take clear pictures of text or drawings in print. |
| jMULTIPLE EXPOSURE | Create a photograph that combines two exposures (a Multiple Exposures). |
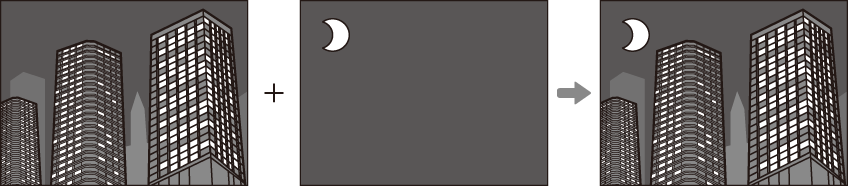
Create a photograph that combines two exposures.
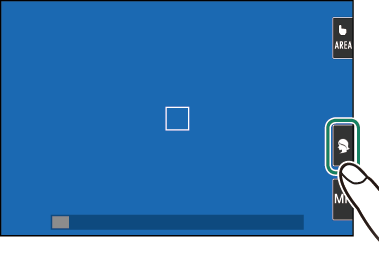
Select jMULTIPLE EXPOSURE in the scene position menu.
Take the first shot.
Press MENU/OK. The first shot will be shown superimposed on the view through the lens and you will be prompted to take the second shot.
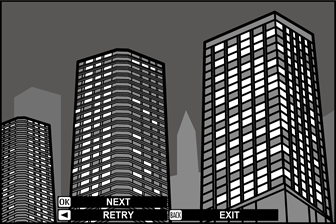
To return to Step 2 and retake the first shot, press the focus stick (focus lever) left. To save the first shot and exit without creating a multiple exposure, press DISP/BACK.
Take the second shot, using the first frame as a guide.
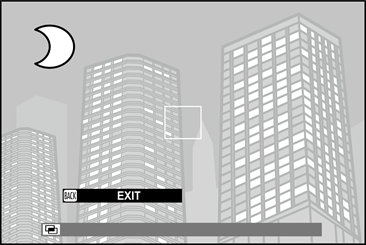
Press MENU/OK to create the multiple exposure, or press the focus stick left to return to Step 4 and retake the second shot.
Take photos with filter effects.
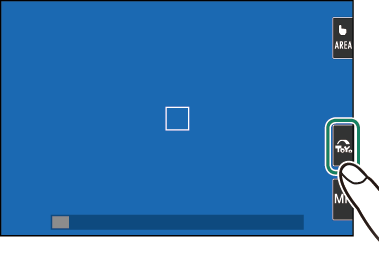
Rotate the mode dial to Adv. (ADVANCED FILTER).

Press MENU/OK to display the shooting menu and select dADVANCED FILTER.

A menu of advanced filter options will be displayed.
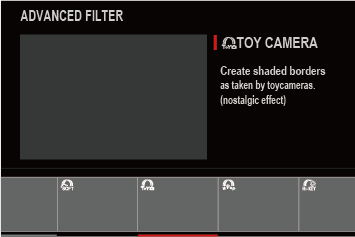
Advanced filter options can also be displayed by tapping the advanced filter icon in the shooting display.
Highlight one of the following options and press MENU/OK.
| Filter | Description |
|---|---|
| G TOY CAMERA | Choose for a retro toy camera effect. |
| I POP COLOR | Create high-contrast images with saturated colors. |
| J HIGH-KEY | Create bright, low-contrast images. |
| Z LOW-KEY | Create uniformly dark tones with few areas of emphasized highlights. |
| E FISH-EYE | Create a distorting effect of a fisheye lens. |
| K DYNAMIC TONE | Dynamic tone expression is used for a fantasy effect. |
| i HDR ART | Create artistic effect by emphasizing tone reproduction and dynamic range. |
| H MINIATURE | The tops and bottoms of pictures are blurred for a diorama effect. |
| L CROSS SCREEN | Create a star pattern where lines radiate out from bright objects. The effects of the cross screen filter can be viewed after shooting. |
| n RICH&FINE | Add a rich & fine effect recommend for tabletop photography. |
| m MONOCHROME(NIR) | Monochrome photography as taken by Near-infrared camera. |
| u PARTIAL COLOR (RED) | Areas of the image that are the selected color are recorded in that color. All other areas of the image are recorded in black-and-white. |
| v PARTIAL COLOR (ORANGE) | |
| w PARTIAL COLOR (YELLOW) | |
| x PARTIAL COLOR (GREEN) | |
| y PARTIAL COLOR (BLUE) | |
| zPARTIAL COLOR (PURPLE) | |
| j FOG REMOVE | Create clearer image by removing fog factor. |
| X SOFT FOCUS | Create a look that is evenly soft throughout the whole image. |
Depending on the subject and camera settings, images may in some cases be grainy or vary in brightness or hue.
 .
.

