
 .
.Using the Flash
Use the built-in flash for additional lighting when shooting at night or indoors under low light.
-
Press the h (N flash) button. Flash options will be displayed.
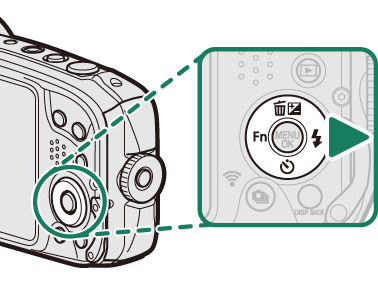
The right (N flash) button on the selector can be assigned other functions using the F [FUNCTION (Fn) SETTING] item in the setup menu. Its default role can also be assigned to other function buttons (a Assigning a Role to the Function Buttons).
Settings can also be adjusted using the p [FLASH SET-UP] item in the shooting menu.
-
Highlight one of the following options and press [MENU/OK].
Mode Description [AUTO] (Auto flash)
K [RED EYE REDUCTION]*The flash fires when required. N [FORCED FLASH]
L [FORCED FLASH]*The flash fires whenever a picture is taken. O [SLOW SYNCHRO]
M [RED EYE & SLOW]*Capture both the main subject and the background under low light (note that brightly lit scenes may be overexposed). P [SUPPRESSED FLASH] The flash does not fire even when the subject is poorly lit. A tripod is recommended. * Red-eye removal is available in these modes when Intelligent Face Detection is active and red-eye removal is on. Red-eye removal minimizes “red-eye” caused when light from the flash is reflected from the subject’s retinas.
If p is displayed when the shutter button is pressed halfway, the flash will fire when the photo is taken.
The flash fires several times with each shot. Do not move the camera until shooting is complete.


