
 .
.Flash Photography
Use the built-in flash for additional lighting when shooting at night or indoors under low light.
-
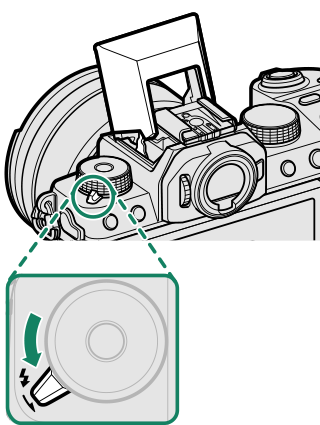
Slide the N lever as shown to raise the flash.
-
Select FLASH FUNCTION SETTING in the F FLASH SETTING menu. The camera will display options for the built-in flash.
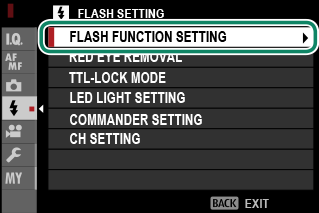
Sync terminal options will be displayed if the built-in flash is lowered and either no flash unit, or an incompatible flash unit, is mounted on the hot shoe (aSYNC TERMINAL). Raise the flash before adjusting settings.
-
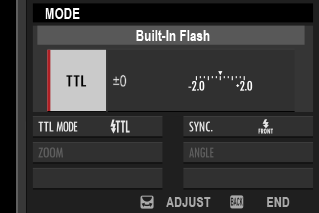
Highlight items using the focus stick (focus lever) and rotate the rear command dial to change the highlighted setting (aFlash Settings).
-
Press DISP/BACK to put the changes into effect.
Depending on the distance to the subject, some lenses may cast shadows in photos taken with the flash.
Be careful not to injure yourself on the edges of the raised flash.
The flash will not fire at some settings, for example in panorama mode or when the electronic shutter is used.
Choose shutter speeds slower than 1/180 when using the flash in exposure mode S (shutter-priority AE) or manual (M).
In TTL mode, the flash may fire several times with each shot. Do not move the camera until shooting is complete.
The flash will not fire if OFF is selected for SOUND & FLASH in the D USER SETTING menu.
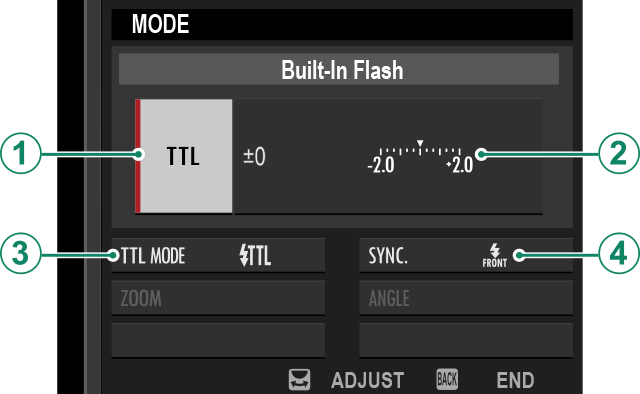
Flash Settings
The following settings are available with the built-in flash.
| Setting | Description |
|---|---|
|
AFlash control mode |
Choose from the following options:
|
|
BFlash compensation/ |
Adjust flash level. The options available vary with the flash control mode (A). |
|
CFlash mode (TTL) |
Choose a flash mode for TTL flash control. The options available vary with the shooting mode (P, S, A, or M) selected.
|
|
DSync |
Choose whether the flash is timed to fire immediately after the shutter opens (H/1ST CURTAIN) or immediately before it closes (I/2ND CURTAIN). 1ST CURTAIN is recommended in most circumstances. |
Red-Eye Removal
Red-eye removal is available when an option other than OFF is selected for FFLASH SETTING > RED EYE REMOVAL and GAF/MF SETTING > FACE/EYE DETECTION SETTING is FACE DETECTION ON. Red-eye removal minimizes “red-eye” caused when light from the flash is reflected from the subject’s retinas.
Flash Sync Speed
The flash will synchronize with the shutter at shutter speeds of 1/180 s or slower.
Optional Flash Units from Fujifilm
The camera can be used with optional Fujifilm shoe-mounted flash units.
Third-Party Flash Units
Do not use third-party flash units that apply over 300 V to the camera hot shoe.


