
 .
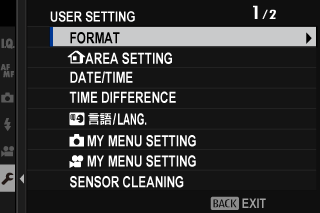
.USER SETTING
Adjust basic camera settings.
To access basic camera settings, press MENU/OK, select the D (SET UP) tab, and choose USER SETTING.
FORMAT
To format a memory card:
-
Select DUSER SETTING > FORMAT in the D(SET UP) tab.
-
A confirmation dialog will be displayed. To format the memory card, highlight OK and press MENU/OK.

To exit without formatting the memory card, select CANCEL or press DISP/BACK.
All data—including protected pictures—will be deleted from the memory card. Be sure important files have been copied to a computer or other storage device.
Do not open the battery-chamber cover during formatting.
bAREA SETTING
Adjust settings for your current time zone.
AREA SETTING
Choose your time zone from a map.
DAYLIGHT SAVINGS
Turn daylight saving time on or off.
| Option | Description |
|---|---|
| ON | Daylight saving time on. |
| OFF | Daylight saving time off. |
DATE/TIME
To set the camera clock:
-
Select DUSER SETTING > DATE/TIME in the D(SET UP) tab.
-
Press the focus stick (focus lever) left or right to highlight the year, month, day, hour, or minute and press up or down to change. To change the order in which the year, month, and day are displayed, highlight the date format and press the focus stick up or down.
-
Press MENU/OK to set the clock.
TIME DIFFERENCE
Switch the camera clock instantly from your home time zone to the local time at your destination when traveling. To specify the difference between your local and home time zone:
Use bAREA SETTING to choose your home time zone before selecting a local time zone using gLOCAL.
-
Highlight gLOCAL and press MENU/OK.
-
Use the focus stick (focus lever) to choose the local time zone. Press MENU/OK when settings are complete.
Select ON to enable daylight saving time.
To set the camera clock to local time, highlight gLOCAL and press MENU/OK. To set the clock to the time in your home time zone, select hHOME.
| Options | |
|---|---|
| gLOCAL | hHOME |
If gLOCAL is selected, g will be displayed in yellow for about three seconds when the camera is turned on.
Qa
Choose a language.
xMY MENU SETTING
Edit the items listed in the E(MY MENU) tab, a personalized custom menu of frequently-used photo menu options (aMY MENU).
FMY MENU SETTING
Edit the items listed in the E(MY MENU) tab, a personalized custom menu of frequently-used movie menu options (aMY MENU).
SENSOR CLEANING
Remove dust from the camera image sensor.
| Option | Description |
|---|---|
| OK | Clean the sensor immediately. |
| WHEN SWITCHED ON | Sensor cleaning will be performed when the camera is turned on. |
| WHEN SWITCHED OFF | Sensor cleaning will be performed when the camera turns off (sensor cleaning is not however performed if the camera turns off in playback mode). |
Dust that cannot be removed using sensor cleaning can be removed using a blower (aCleaning the Image Sensor).
SOUND & FLASH
Select OFF to disable the speaker, flash, illuminator, and self-timer lamp in situations in which camera sounds and lights may be unwelcome.
| Options | |
|---|---|
| ON | OFF |
RESET
Reset shooting or setup menu options to default values.
-
Highlight the desired option and press MENU/OK.
Option Description STILL MENU RESET Reset all photo menu settings other than custom white balance and custom settings banks created using EDIT/SAVE CUSTOM SETTING to default values. MOVIE MENU RESET Reset all settings other than custom white balance options selected using F WHITE BALANCE. SET-UP RESET Reset all setup menu settings other than DATE/TIME, bAREA SETTING, TIME DIFFERENCE, and COPYRIGHT INFO to default values. INITIALIZE Reset all settings other than custom white balance to default values. -
A confirmation dialog will be displayed; highlight OK and press MENU/OK.
REGULATORY
To view electronic copies of the product model number, and other certificates, select DUSER SETTING > REGULATORY in the setup menu.


