This section describes how to take pictures using program AE (mode [P]).
Adjust settings for program AE.
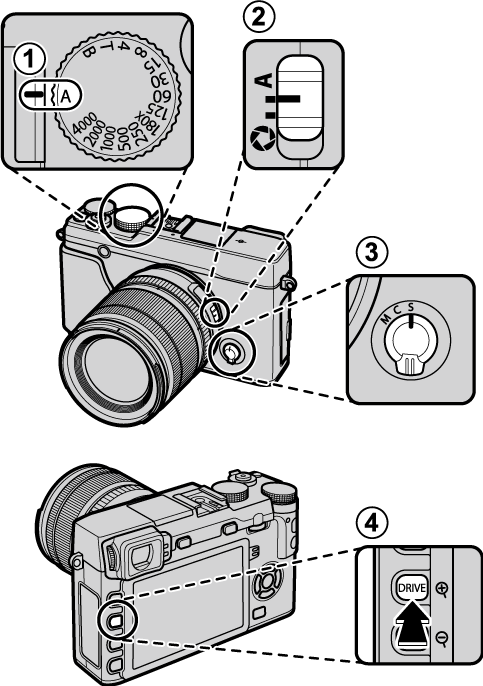
 [Shutter speed]: Select [A] (auto)
 [Aperture]: Select [A] (auto)
 [Focus mode]: Select [S] (single AF)
 [DRIVE mode]: Select
  (still image)
Confirm that [P] appears in the display.
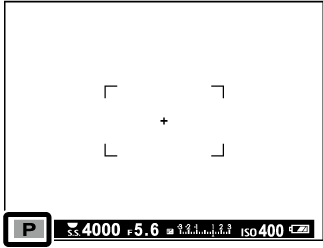
If [AUTO] is displayed in red, press a function button (by default, [Fn2]/[AUTO]) to exit auto mode.
Image stabilization is recommended.
The [Q] Button
The [Q] button can be used to view and adjust camera settings.
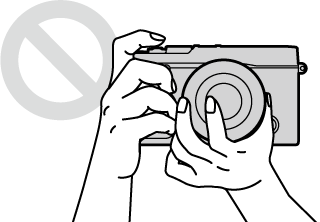
Ready the camera.
Hold the camera steady with both hands and brace your elbows against your sides. Shaking or unsteady hands can blur your shots.
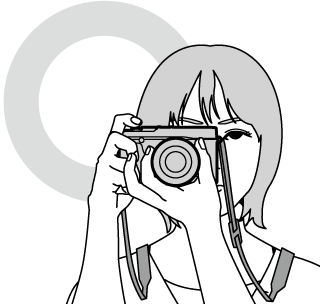
To prevent pictures that are out of focus or too dark (underexposed), keep your fingers and other objects away from the lens, flash, and AF-assist illuminator.
Frame the picture.
Lenses with Zoom Rings
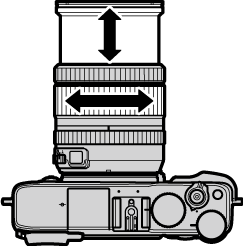
Use the zoom ring to frame the picture in the display.
Focus.
Frame the picture with your subject in the center of the display and press the shutter button halfway to focus.

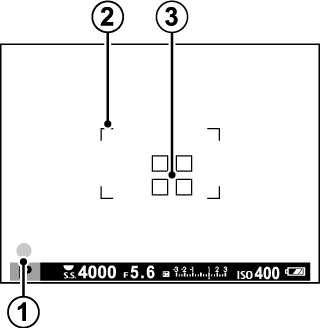
Focus indicator
Focus frame
Area in focus
If the camera is able to focus, it will beep twice and the focus indicator and area in focus will glow green. Focus and exposure will lock while the shutter button is pressed halfway.
If the camera is unable to focus, the focus frame will turn red,  will be displayed, and the focus indicator will blink white.
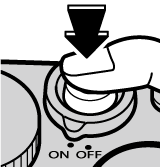
Shoot.
Smoothly press the shutter button the rest of the way down to take the picture.
 .
.