Parts of the Camera
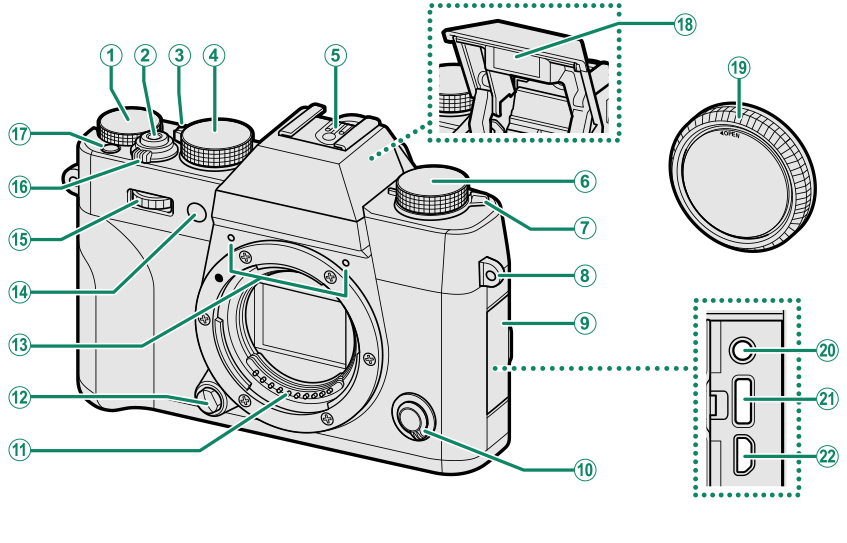
AExposure compensation dial
BShutter button
CAuto mode selector lever
DShutter speed dial
EHot shoe
FDrive dial
GN (flash pop-up) lever
HStrap eyelet
IConnector cover
JFocus mode selector
KLens signal contacts
LLens release button
MMicrophone
NAF-assist illuminator
Self-timer lamp
OFront command dial
PON/OFF switch
QFn1 button
RFlash
SBody cap
TMicrophone/remote release connector
(Φ 2.5 mm)
UUSB connector (Type-C)
VHDMI Micro connector (Type D)
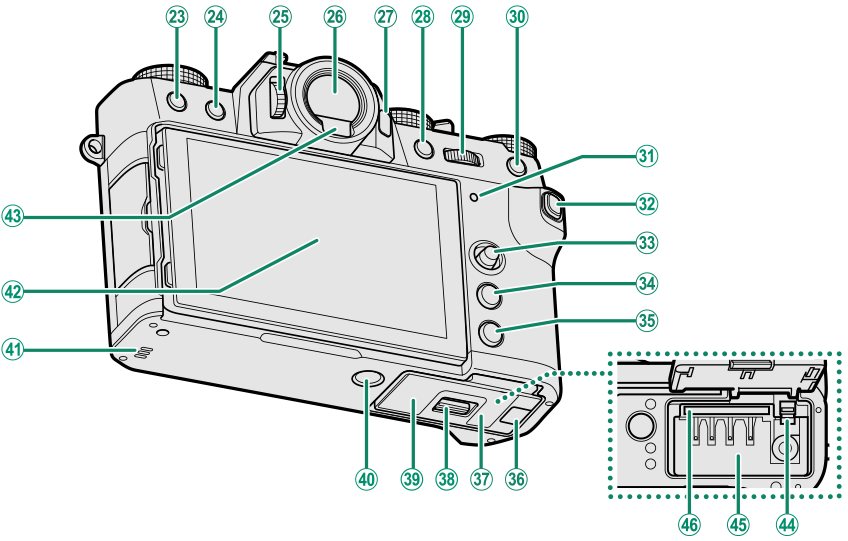
Wb (delete) button
Xa (playback) button
YDiopter adjustment control
ZElectronic viewfinder (EVF)
aVIEW MODE button
bAE-L (exposure lock) button
cRear command dial
dAF-L (focus lock) button
eIndicator lamp
fQ (quick menu) button
gFocus stick (focus lever)
hMENU/OK button
iDISP (display)/BACK button
jCable channel cover for DC coupler
kBattery-chamber cover
lBattery-chamber cover latch
mSerial number plate
nTripod mount
oSpeaker
pLCD monitor
Touch screen
qEye sensor
rBattery latch
sBattery chamber
tMemory card slot
- The Serial Number Plate
- The Focus Stick (Focus Lever)
- The Shutter Speed Dial
- The Drive Dial
- The Exposure Compensation Dial
- The Auto Mode Selector Lever
- The Command Dials
- The Indicator Lamp
- Focusing the Viewfinder
- The LCD Monitor
The Serial Number Plate
Do not remove the serial number plate, which provides the FCC ID, KC mark, serial number, and other important information.
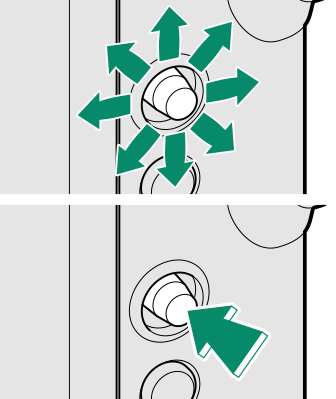
The Focus Stick (Focus Lever)
Tilt or press the focus stick to select the focus area. The focus stick can also be used to navigate the menus.
The Shutter Speed Dial
The shutter speed dial is used to choose the shutter speed.
The Drive Dial
Rotate the dial to choose from the following the drive modes.
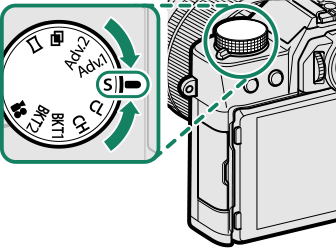
| Mode | |
|---|---|
| F | Movie (aRecording Movies) |
| BKT1 BKT2 |
Bracketing (aBracketing) |
| CH | High-speed burst (aContinuous Shooting (Burst Mode)) |
| CL | Low-speed burst (aContinuous Shooting (Burst Mode)) |
| S | Single frame (aTaking Photographs (Mode P)) |
| ADv.1 Adv.2 |
Advanced filter (aAdvanced Filters) |
| j | Multiple exposure (aMultiple exposures) |
| u | Panorama (aPanoramas) |
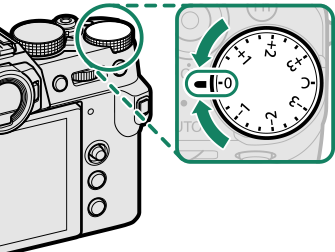
The Exposure Compensation Dial
Rotate the dial to choose an exposure compensation amount.
The Auto Mode Selector Lever
Switch between auto and manual modes.
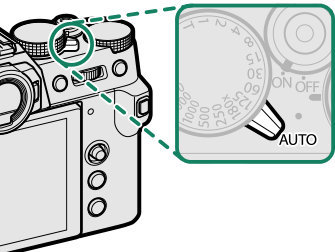
| Position | Mode |
|---|---|
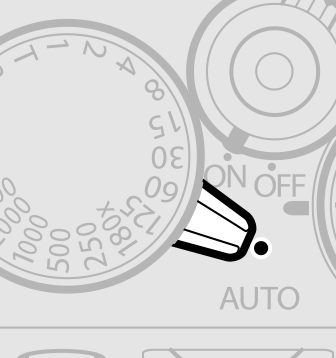 |
Select from P (program AE), S (shutter-priority AE), A (aperture-priority AE), and M (manual) modes (aMode P: Program AE, Mode S: Shutter-Priority AE, Mode A: Aperture-Priority AE, Mode M: Manual Exposure). Adjust shutter speed and aperture using program shift (mode P) or set shutter speed and/or aperture manually (modes S, A, and M). |
 |
Auto mode. The camera adjusts settings automatically according to the option selected by rotating the front command dial. Choose from modes suited to specific subject types (aAuto Mode), or select S ADVANCED SR AUTO to let the camera automatically match the mode to the subject (aAuto Mode). Scene selection is not available in drive modes Adv.1, Adv.2, j, and u. |
Restrictions may apply to camera settings depending on the mode and shooting conditions.
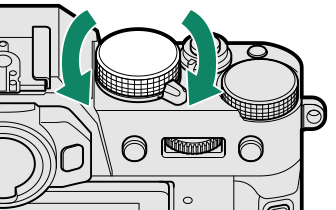
The Command Dials
Rotate or press the command dials to:
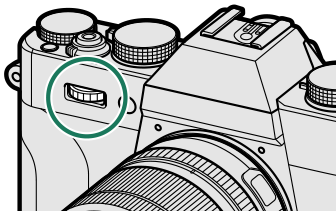
|
Rotate |
Select menu tabs or page through menus Adjust aperture 1, 2 Choose a scene (auto mode) Adjust exposure compensation 4 Adjust sensitivity 2 View other pictures during playback |
|---|---|
|
Press |
Switch back and forth between aperture and exposure compensation 2, 5 Press and hold to choose the option selected for DBUTTON/DIAL SETTING > COMMAND DIAL SETTING in the D (setup) menu |
1 Aperture set to A (auto) and lens equipped with aperture ring or COMMAND selected for DBUTTON/DIAL SETTING > APERTURE RING SETTING (A).
2 Can be changed using DBUTTON/DIAL SETTING > COMMAND DIAL SETTING.
3 Available only if FOCUS CHECK is assigned to a function button.
4 Exposure compensation dial rotated to C.
5 Can be used to switch back and forth between aperture, sensitivity, and exposure compensation when exposure compensation dial is rotated to C.
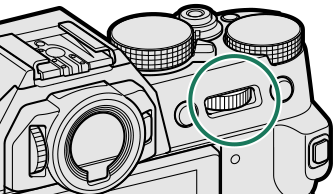
|
Rotate |
Highlight menu items Choose the desired combination of shutter speed and aperture (program shift) Choose a shutter speed 2 Adjust settings in the quick menu Choose the size of the focus frame Zoom in or out in full frame playback Zoom in or out in multi-frame playback |
|---|---|
|
Press |
Perform the function assigned to the DIAL function button Zoom in on the active focus point 3 Press and hold to choose the manual focus mode focus display 3 Zoom in on the active focus point during playback |
1 Aperture set to A (auto) and lens equipped with aperture ring or COMMAND selected for DBUTTON/DIAL SETTING > APERTURE RING SETTING (A).
2 Can be changed using DBUTTON/DIAL SETTING > COMMAND DIAL SETTING.
3 Available only if FOCUS CHECK is assigned to a function button.
4 Exposure compensation dial rotated to C.
5 Can be used to switch back and forth between aperture, sensitivity, and exposure compensation when exposure compensation dial is rotated to C.
The Indicator Lamp
Camera status is shown by the indicator lamp.
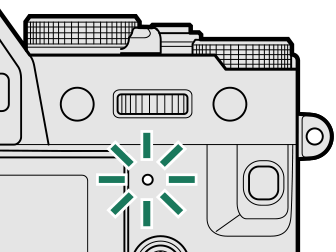
| Indicator lamp | Camera status |
|---|---|
| Glows green | Focus locked. |
| Blinks green | Focus or slow shutter speed warning. Pictures can be taken. |
| Blinks green and orange | Camera on: Recording pictures. Additional pictures can be taken. Camera off: Uploading pictures to a smartphone or tablet. * |
| Glows orange | Recording pictures. No additional pictures can be taken at this time. |
| Blinks orange | Flash charging; flash will not fire when picture is taken. |
| Blinks red | Lens or memory error. |
* Displayed only if pictures are selected for upload.
Warnings may also appear in the display.
The indicator lamp remains off while your eye is to the viewfinder.
The FMOVIE SETTING > TALLY LIGHT option can be used to choose the lamp (indicator or AF-assist) that lights during movie recording and whether the lamp blinks or remains steady.
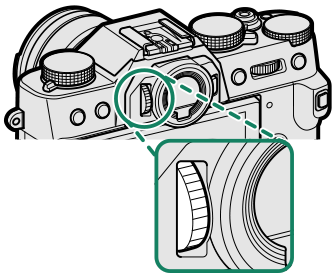
Focusing the Viewfinder
Viewfinder focus can be adjusted by rotating the diopter adjustment control.
The LCD Monitor
The LCD monitor can be tilted for easier viewing, but be careful not to touch the wires or trap fingers or other objects behind the monitor. Touching the wires could cause camera malfunction.
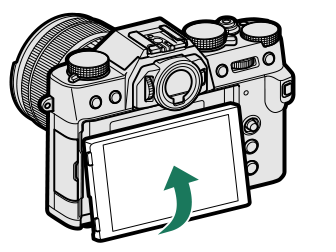
The LCD monitor also functions as a touch screen that can be used for:

 .
.


