
The optional VG-GF1 vertical battery grip accommodates an extra battery for improved endurance and makes it easier to hold the camera rotated 90° to frame pictures in “tall” (portrait) orientation.
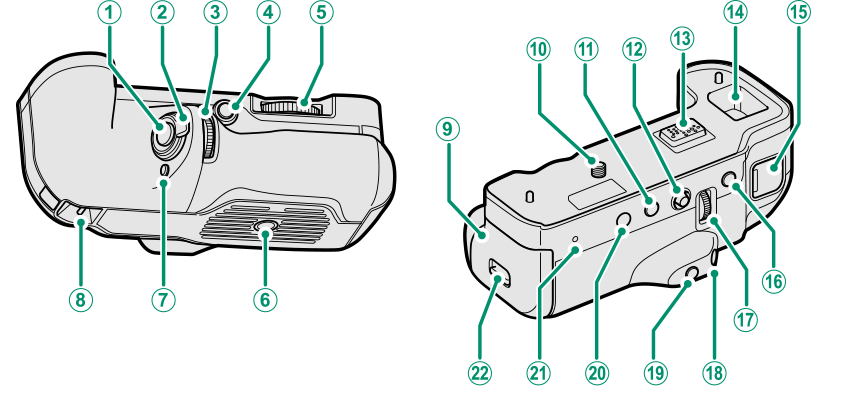
 Shutter button
 Control lock
 Front command dial
 Fn2 (function 2) button
 Lock screw knob
 Tripod socket
 Fn1 (function 1) button
 Eyelet for camera strap
 Battery-chamber cover
 Lock screw
 Fn5 (function 5) button
 Focus stick (focus lever)
 Connector
 Compartment for connector cover supplied with camera
 15 V DC-IN connector
 Fn4 (function 4) button
 Rear command dial
 Fn3 (function 3) button
 Q (quick menu) button
 MENU/OK button
 Indicator lamps
 Battery-chamber cover latch
Do not attempt to attach the clips supplied with the camera to the eyelets () on the battery grip.
All controls perform the same function as the matching controls on the camera.
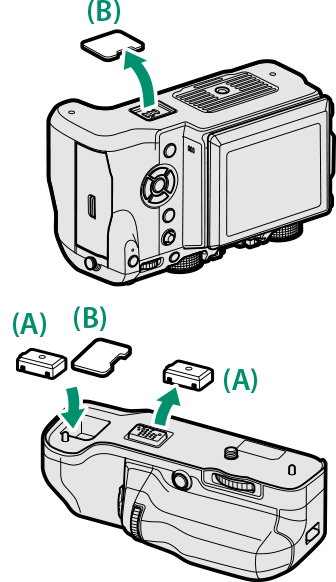
The VB-GF1 attaches as shown below.
Remove the vertical battery grip connector cover from the camera and place it in the grip connector cover compartment.
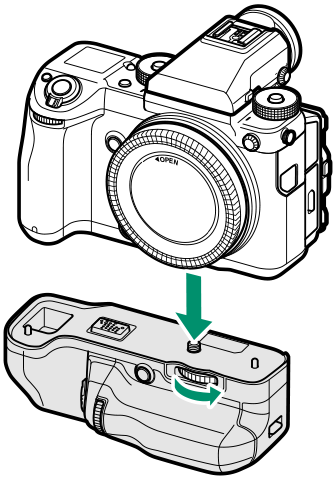
Align the connectors on the grip with the matching connectors on the camera. Rotate the lock screw knob to tighten the lock screw.
Insert a battery as shown below.
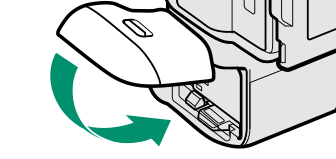
Unlatch and open the battery-chamber cover.
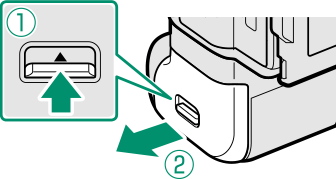
Slide the battery in until it latches.

Close the battery-chamber cover.
The battery in the grip is used before the battery in the camera. The camera automatically switches to the camera battery when the battery in the grip is exhausted. Movie recording and bulb photography will end when the camera switches batteries. When the battery in the grip is exhausted, remove and charge the battery or insert a fully-charged spare battery. If the camera battery has enough charge to power the camera, the battery in the grip can be replaced without turning the camera off.
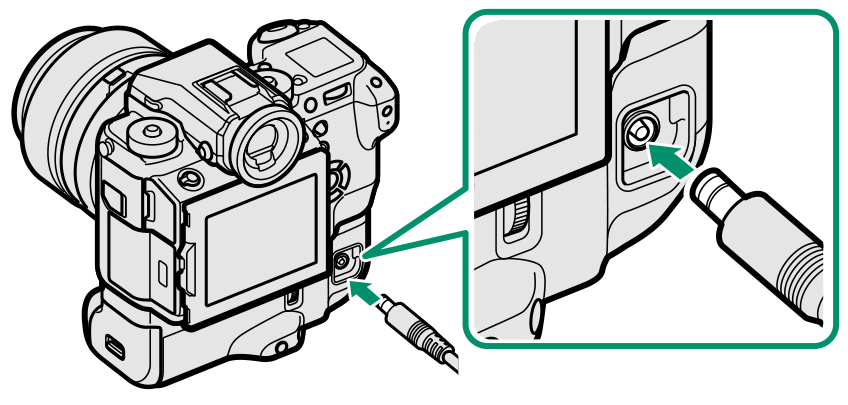
Using an AC Adapter
An optional AC-15V AC adapter can be used to power the camera when the battery grip is attached. The battery inserted in the grip will charge while the adapter is connected; charging takes about 120 minutes. Turn the camera off before disconnecting the AC adapter.
Battery charge status is shown by battery status icons when the camera is on (playback mode) and by the indicator lamp when the camera is off.
| Battery status icon (camera on) | Indicator lamp (camera off) | Battery status |
|---|---|---|
 (yellow) (yellow) |
On | Battery charging |
 (green) (green) |
Off | Charging complete |
 (red) (red) |
Blinks | Battery fault |
 .
.

