
 .
.[P], [S], [A], and [M] Modes
[P], [S], [A], and [M] modes give you varying degrees of control over shutter speed and aperture.
- Mode [P]: Program AE
- Mode [S]: Shutter-Priority AE
- Mode [A]: Aperture-Priority AE
- Mode [M]: Manual Exposure
- FILTER
- Custom Modes
Mode [P]: Program AE
Let the camera choose shutter speed and aperture for optimal exposure. Other values that produce the same exposure can be selected with program shift.

Rotate the mode dial to [P].
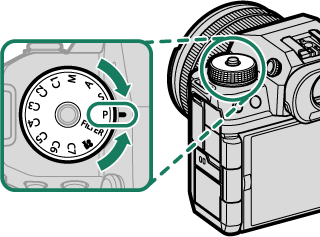

[P] will appear in the display.
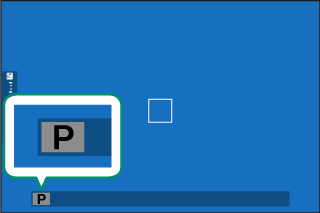
If the subject is outside the metering range of the camera, the shutter speed and aperture displays will show “–––”.
Rotate the mode dial only after pressing the dial lock release to release the dial.
Program Shift
If desired, you can rotate the front command dial to select other combinations of shutter speed and aperture without altering exposure (program shift).
Shutter speed
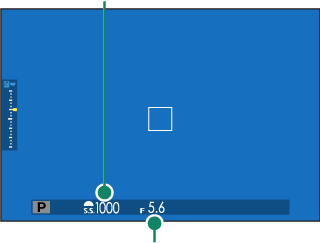
Aperture
Program shift is not available in any of the following circumstances:
- When TTL is selected for F[FLASH SETTING] > [FLASH FUNCTION SETTING]
- When an auto option is selected for H[IMAGE QUALITY SETTING] > [DYNAMIC RANGE]
- In movie mode
To cancel program shift, turn the camera off.
Mode [S]: Shutter-Priority AE
Choose a shutter speed and let the camera adjust aperture for optimal exposure.
-
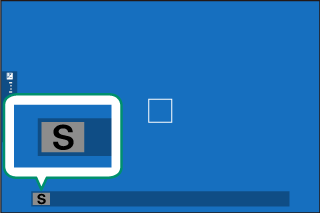
Rotate the mode dial to [S].
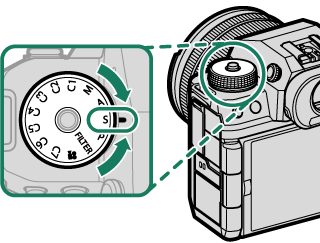
[S] will appear in the display.
-
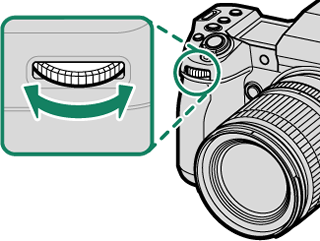
Rotate the front command dial to choose a shutter speed.
The roles played by the front command dial can be changed using D[BUTTON/DIAL SETTING] > [COMMAND DIAL SETTING].
If the correct exposure cannot be achieved at the selected shutter speed, aperture will be displayed in red.
If the subject is outside the metering range of the camera, the aperture display will show “–––”.
Rotate the mode dial only after pressing the dial lock release to release the dial.
Shutter speed can be adjusted while the [AFON] button is pressed or the shutter button is pressed halfway.
At shutter speeds slower than 1 second, a count-down timer will be displayed while the exposure is in progress.
To reduce “noise” (mottling) in long time-exposures, select [ON] for H[IMAGE QUALITY SETTING] > [LONG EXPOSURE NR]. Note that this may increase the time needed to record images after shooting.
The picture will go out of focus if the camera is moved during a long time-exposure; use of a tripod is recommended.
Mode [A]: Aperture-Priority AE
Choose an aperture and let the camera adjust shutter speed for optimal exposure.
-
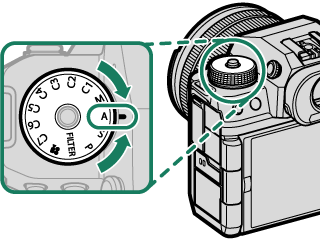
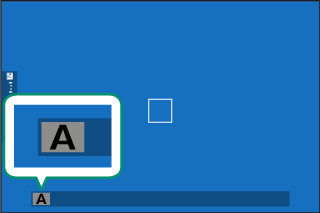
Rotate the mode dial to [A].
[A] will appear in the display.
-
Rotate the lens aperture ring to choose an aperture.
If the lens is not equipped with an aperture ring or if the aperture ring is in the [A] position, aperture can be adjusted by rotating the front command dial.
The roles played by the front command dial can be changed using D[BUTTON/DIAL SETTING] > [COMMAND DIAL SETTING].
If the correct exposure cannot be achieved at the selected aperture, shutter speed will be displayed in red.
If the subject is outside the metering range of the camera, the shutter speed display will show “–––”.
Rotate the mode dial only after pressing the dial lock release to release the dial.
Aperture can be adjusted even while the shutter button is pressed halfway.
Previewing Depth of Field
When [PREVIEW DEPTH OF FIELD] is assigned to a function button, pressing the button displays a L icon and stops aperture down to the selected setting, allowing depth of field to be previewed in the display.
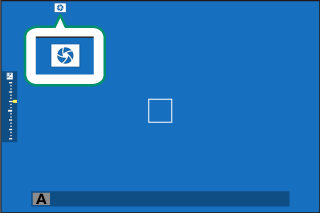
Mode [M]: Manual Exposure
In manual mode, the user controls both shutter speed and aperture. Shots can be deliberately overexposed (brighter) or underexposed (darker), opening the door for a variety of individual creative expression. The amount the picture would be under- or over-exposed at current settings is shown by the exposure indicator; adjust shutter speed and aperture until the desired exposure is reached.
-
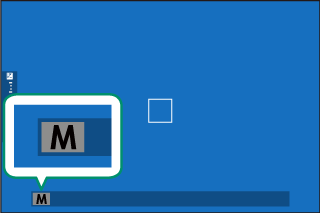
Rotate the mode dial to [M].
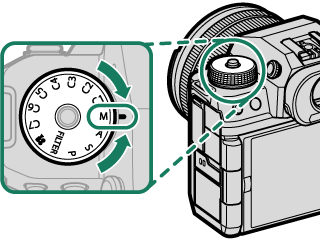
[M] will appear in the display.
-
Rotate the rear command dial to choose a shutter speed and the lens aperture ring to choose an aperture.
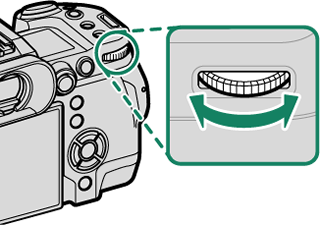
The manual exposure display includes an exposure indicator that shows the amount the picture would be under- or over-exposed at current settings.
If the lens is not equipped with an aperture ring or if the aperture ring is in the [A] position, aperture can be adjusted by rotating the front command dial.
The roles played by the front and rear command dial can be changed using D[BUTTON/DIAL SETTING] > [COMMAND DIAL SETTING].
Rotate the mode dial only after pressing the dial lock release to release the dial.
BULB
Select a shutter speed of [BULB] for long time-exposures in which you open and close the shutter manually. Use of a tripod is recommended to prevent the camera moving during the exposure.
-
Set shutter speed to [BULB].
-
Press the shutter button all the way down.
- The shutter will remain open for up to 60 minutes while the shutter button is pressed.
- The display shows the time elapsed since the exposure started.
- Releasing the shutter button closes the shutter, ending the exposure. Processing will begin, and the camera will display the processing time remaining.
Bulb photography is not available in drive modes other than [STILL IMAGE] or when the electronic shutter is selected for A[SHOOTING SETTING] > [SHUTTER TYPE].
Selecting an aperture of [A] fixes shutter speed at 30 s.
To reduce “noise” (mottling) in long time-exposures, select [ON] for H[IMAGE QUALITY SETTING] > [LONG EXPOSURE NR]. Note that this may increase the time needed to record images after shooting.
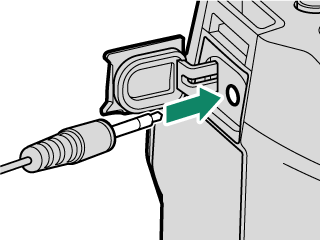
Using a Remote Release
A remote release can be used for long time-exposures. When using an optional RR-100 remote release or an electronic release from third-party suppliers, connect it to the camera's remote release connector.
Exposure Preview
To preview exposure in the LCD monitor, select [PREVIEW EXP./WB] for D[SCREEN SET-UP] > [PREVIEW EXP./WB IN MANUAL MODE].
[PREVIEW EXP./WB]
[PREVIEW WB] or [OFF]
Select an option other than [PREVIEW EXP./WB] when using the flash or on other occasions on which exposure may change when the picture is taken.
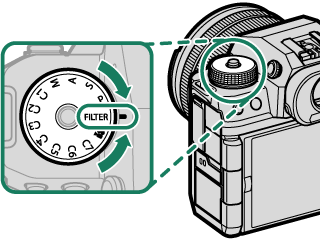
FILTER
Take photos with filter effects.
-
Rotate the mode dial to [FILTER].
-
Choose a filter via A[SHOOTING SETTING] > [FILTER SETTING].
Filter Description G[TOY CAMERA] Choose for a retro toy camera effect. H[MINIATURE] The tops and bottoms of pictures are blurred for a diorama effect. I[POP COLOR] Create high-contrast images with saturated colors. J[HIGH-KEY] Create bright, low-contrast images. Z[LOW-KEY] Create uniformly dark tones with few areas of emphasized highlights. K[DYNAMIC TONE] Dynamic tone expression is used for a fantasy effect. X[SOFT FOCUS] Create a look that is evenly soft throughout the whole image. u[PARTIAL COLOR (RED)] Areas of the image that are the selected color are recorded in that color. All other areas of the image are recorded in black-and-white. v[PARTIAL COLOR (ORANGE)] w[PARTIAL COLOR (YELLOW)] x[PARTIAL COLOR (GREEN)] y[PARTIAL COLOR (BLUE)] z[PARTIAL COLOR (PURPLE)] Depending on the subject and camera settings, images may in some cases be grainy or vary in brightness or hue.
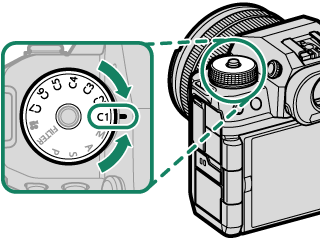
Custom Modes
Rotate the mode dial to any of modes [C1] ([CUSTOM 1]) through [C7] ([CUSTOM 7]) to take pictures using previously-saved shooting menu settings.
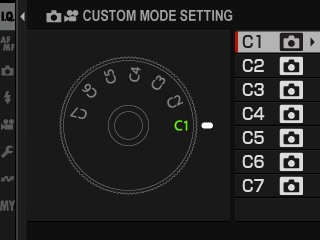
Mode Selection: Still Photography or Movie
Choose whether the selected custom settings bank ([C1] through [C7]) is for still photography (x[STILL]) or movie recording (F[MOVIE]).
-
Navigate to H[IMAGE QUALITY SETTING] in the photo menus, highlight xF[CUSTOM MODE SETTING], and press [MENU/OK].
You can also use B[MOVIE SETTING] > xF[CUSTOM MODE SETTING] in the movie menus.
-
Highlight the desired custom settings bank and press [MENU/OK].
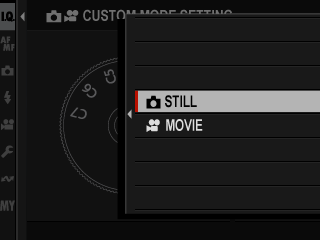
-
Highlight x[STILL] or F[MOVIE] and press [MENU/OK].
The selected custom settings bank can now be used for still photography or movie recording.
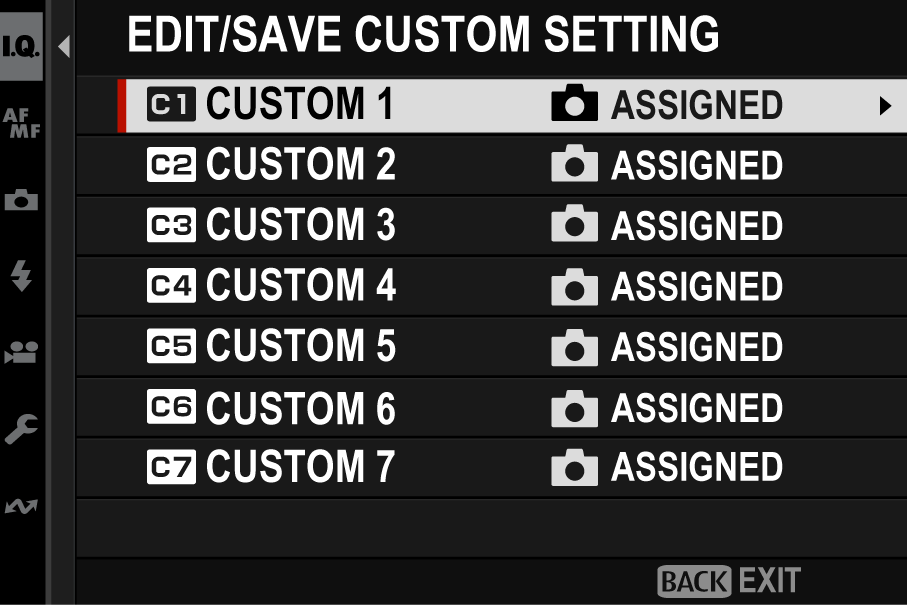
Saving Current Settings
Save current settings in a custom settings bank.
-
Navigate to H[IMAGE QUALITY SETTING] in the photo menus, highlight x[EDIT/SAVE CUSTOM SETTING], and press [MENU/OK].
To save settings for movie recording, navigate to B[MOVIE SETTING] in the movie menus and select F[EDIT/SAVE CUSTOM SETTING].
-
Highlight a destination bank for current settings ([C1] through [C7]) and press [MENU/OK].
-
Highlight [SAVE CURRENT SETTINGS] and press [MENU/OK].
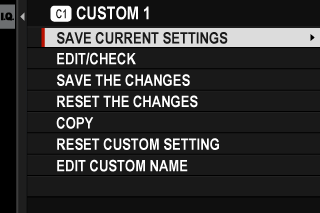
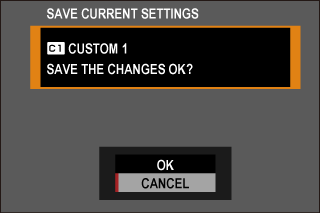
-
Highlight [OK] and press [MENU/OK].
Current settings will be saved to the selected bank.
Editing Custom Settings
Edit existing custom settings banks.
-
Navigate to H[IMAGE QUALITY SETTING] in the photo menus, highlight x[EDIT/SAVE CUSTOM SETTING], and press [MENU/OK].
To save settings for movie recording, navigate to B[MOVIE SETTING] in the movie menus and select F[EDIT/SAVE CUSTOM SETTING].
-
Highlight the desired custom settings bank and press [MENU/OK].
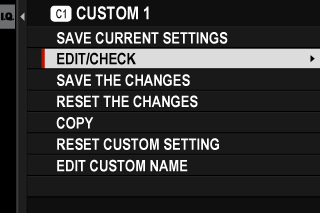
-
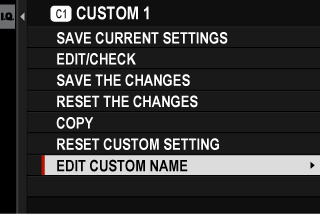
Highlight [EDIT/CHECK] and press [MENU/OK].
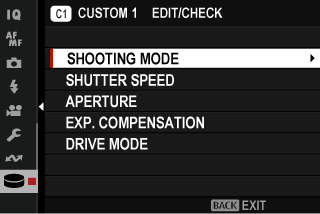
-
The camera will display a list of shooting menu items; highlight an item you wish to edit and press [MENU/OK].
Adjust settings for the selected item.
-
Press [MENU/OK] to save the changes and return to the shooting menu list.
Adjust additional items as desired.
If [DISABLE] is selected for H[IMAGE QUALITY SETTING] > [AUTO UPDATE CUSTOM SETTING] in the photo menu or for B[MOVIE SETTING] > F[AUTO UPDATE CUSTOM SETTING] in the movie menu, red dots will appear next to the edited items but the changes will not be saved automatically.
- To save the changes for selected items, highlight the items in the list and press [Q].
- To save changes for all items, return to Step 3 and select [SAVE THE CHANGES]. To cancel all changes and restore the previous settings, select [RESET THE CHANGES].
- If you copy an item marked by a red dot, the item will be copied with the changes intact.
Copying Custom Settings
Copy custom settings from one bank to another, overwriting the settings in the destination bank. If the source bank has been renamed, the name will also be copied to the destination bank.
-
Navigate to H[IMAGE QUALITY SETTING] in the photo menus, highlight x[EDIT/SAVE CUSTOM SETTING], and press [MENU/OK].
To copy settings for a movie custom settings bank, navigate to B[MOVIE SETTING] in the movie menus and select F[EDIT/SAVE CUSTOM SETTING].
-
Highlight the source bank and press [MENU/OK].
-
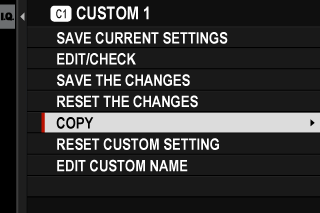
Highlight [COPY] and press [MENU/OK].
-
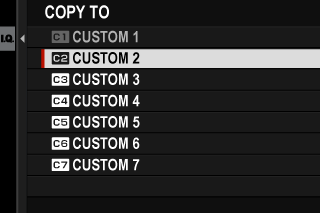
Highlight the destination bank ([C1] through [C7]) and press [MENU/OK].
A confirmation dialog will be displayed.
Any changes to custom settings in the destination bank will be overwritten.
-
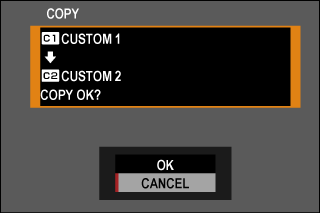
Highlight [OK] and press [MENU/OK].
The selected settings will be copied to the destination bank, overwriting any existing settings.
Resetting Custom Settings
Reset selected custom settings banks.
-
Select H[IMAGE QUALITY SETTING] > x[EDIT/SAVE CUSTOM SETTING] in the shooting menu and press [MENU/OK].
This assumes that you wish to reset settings for still photography. To reset movie settings, navigate to B[MOVIE SETTING] in the movie menus and select F[EDIT/SAVE CUSTOM SETTING].
-
Highlight the desired custom settings bank and press [MENU/OK].
-
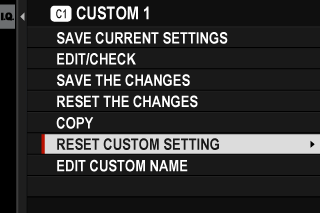
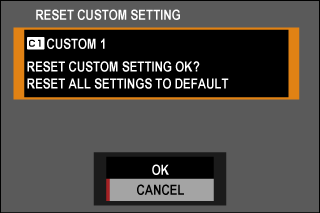
Highlight [RESET CUSTOM SETTING] and press [MENU/OK].
A confirmation dialog will be displayed.
-
Highlight [OK] and press [MENU/OK].
The selected bank will be reset.
Renaming Custom Settings Banks
Rename selected custom settings banks.
-
Select H[IMAGE QUALITY SETTING] > x[EDIT/SAVE CUSTOM SETTING] in the shooting menu and press [MENU/OK].
This assumes that you wish to rename settings for still photography. To rename movie settings, navigate to B[MOVIE SETTING] in the movie menus and select F[EDIT/SAVE CUSTOM SETTING].
-
Highlight the desired custom settings bank and press [MENU/OK].
-
Highlight [EDIT CUSTOM NAME] and press [MENU/OK].
-
Enter a new name for the custom settings bank and select [SET].
The selected bank will be renamed.


