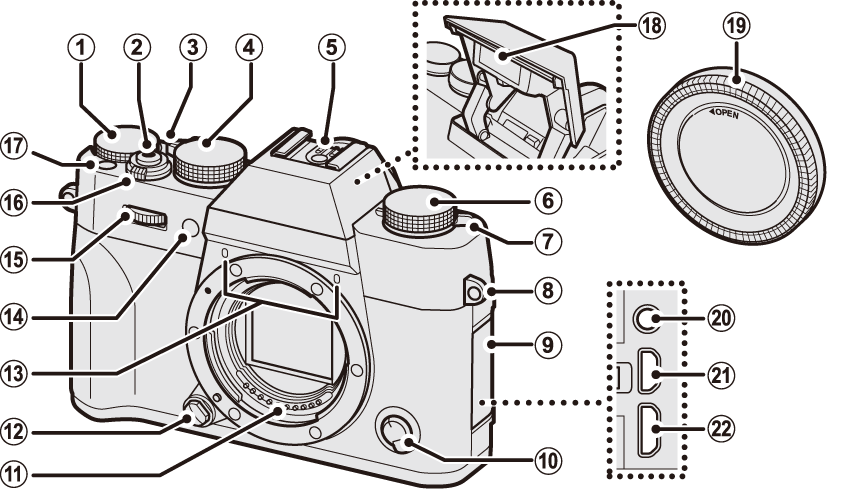
Exposure compensation dial
Shutter button
Auto mode selector lever
Shutter speed dial
Hot shoe
Drive dial
 (flash pop-up) lever
Strap eyelet
Connector cover
Focus mode selector
Lens signal contacts
Lens release button
Microphone
AF-assist illuminator
Self-timer lamp
Front command dial
ON/OFF switch
Fn1 button
Flash
Body cap
Microphone/remote release connector (Φ 2.5 mm)
HDMI Micro connector (Type D)
Micro USB (Micro-B)
USB 2.0 connector
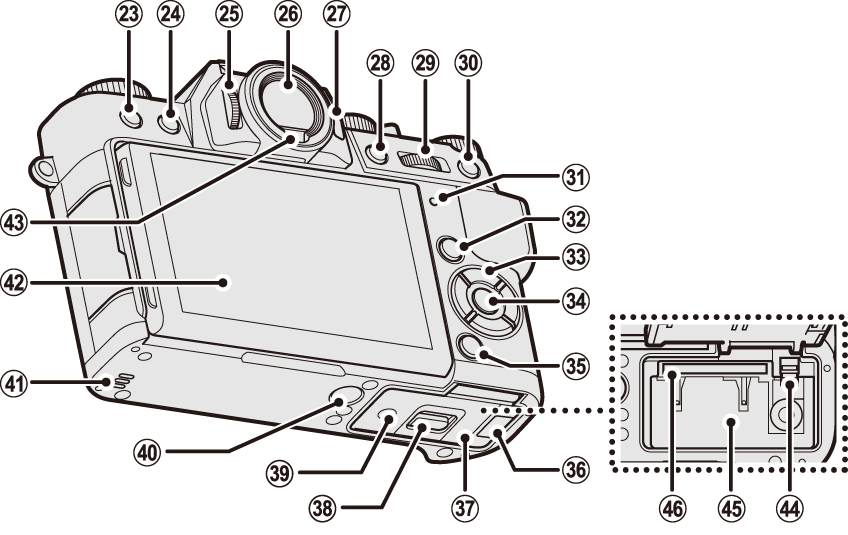
(delete) button
(playback) button
Diopter adjustment control
Electronic viewfinder (EVF)
VIEW MODE button
AE-L (exposure lock) button
Rear command dial
AF-L (focus lock) button
Indicator lamp
Q (quick menu) button
Selector buttons
MENU/OK button
DISP (display)/BACK button
Cable channel cover for DC coupler
Battery-chamber cover
Battery-chamber cover latch
Serial number plate
Tripod mount
Speaker
LCD monitor
Eye sensor
Battery latch
Battery chamber
Memory card slot
Do not remove the serial number plate, which provides the FCC ID, KC mark, serial number, and other important information.
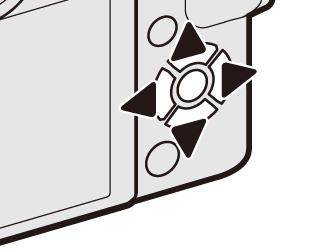
Press the selector up (), right (
), down (
), or left (
) to highlight items. The up, down, left, and right buttons also double as function buttons Fn2 through Fn5 (
The Fn (Function) Buttons).
Control Lock
To prevent accidental operation of the selector and Q button during shooting, press MENU/OK until is displayed. The controls can be unlocked by pressing MENU/OK until
is no longer displayed.
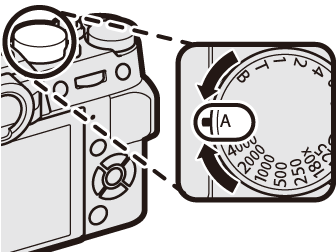
The shutter speed dial is used to choose the shutter speed.
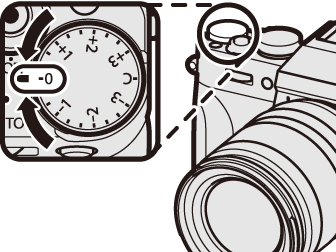
Rotate the dial to choose an exposure compensation amount.
Rotate the dial to choose from the following the drive modes.
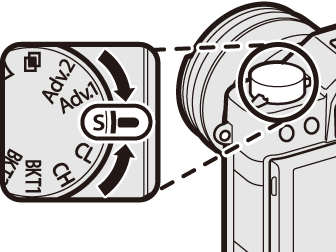
| Mode | |
|---|---|
| Movie ( |
|
| BKT1 BKT2 |
Bracketing ( |
| CH | High-speed burst ( |
| CL | Low-speed burst ( |
| S | Single frame ( |
| Adv.1 Adv.2 |
Advanced filter ( |
| Multiple exposure ( |
|
| Panorama ( |
|
Switch between auto and manual modes.
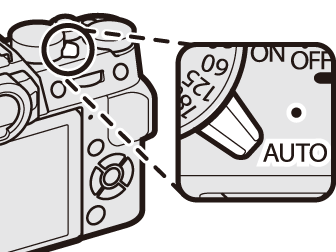
| Position | Mode |
|---|---|
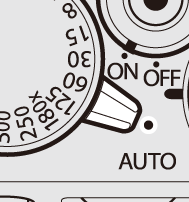 |
Select from P (program AE), S (shutter-priority AE), A (aperture-priority AE), and M (manual) modes ( |
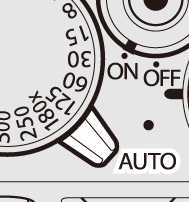 |
Auto mode. The camera adjusts settings automatically according to the option selected by rotating the
front command dial. Choose from modes suited to specific subject types ( |
Restrictions may apply to camera settings depending on the mode and shooting conditions.
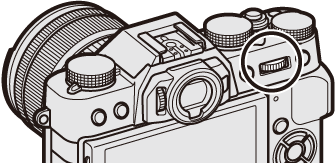
Rotate or press the command dials to:

|
Rotate |
Select menu tabs or page through menus. Adjust aperture. Select a scene when shooting in auto mode. Adjust exposure compensation when C is selected with exposure compensation dial. View other pictures during playback. |
|---|---|
|
Press |
Switch back and forth between aperture and exposure compensation when C is selected with the exposure compensation dial. |
|
Rotate |
Highlight menu items. Choose the desired combination of shutter speed and aperture (program shift). Choose a shutter speed. Adjust settings in the quick menu. Choose the size of the focus frame. Zoom in or out in full-frame or multi-frame playback. |
|---|---|
|
Press |
Zoom in on the active focus point during playback. Perform the function assigned to the DIAL function button. Press and hold to choose the manual focus mode focus display. |
When the viewfinder is not in use, camera status is shown by the indicator lamp.
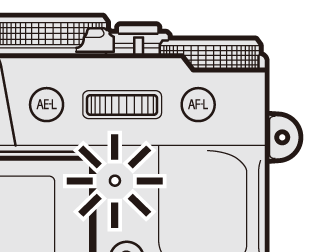
| Indicator lamp | Camera status |
|---|---|
| Glows green | Focus locked. |
| Blinks green | Focus or slow shutter speed warning. Pictures can be taken. |
| Blinks green and orange | Recording pictures. Additional pictures can be taken. |
| Glows orange | Recording pictures. No additional pictures can be taken at this time. |
| Blinks orange | Flash charging; flash will not fire when picture is taken. |
| Blinks red | Lens or memory error. |
Warnings may also appear in the display.
The LCD monitor can be tilted for easier viewing, but be careful not to touch the wires or trap fingers or other objects behind the monitor. Touching the wires could cause camera malfunction.
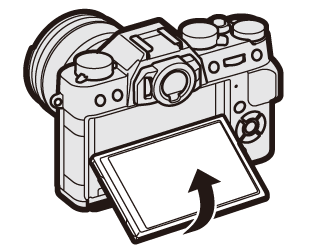
The LCD monitor also functions as a touch screen (Touch Screen Mode,
TOUCH SCREEN MODE).
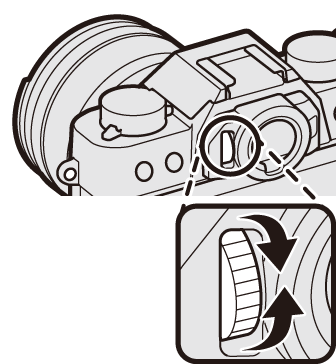
The camera is equipped with diopter adjustment in the range −4 to +2 m–1 to accommodate individual differences in vision. Rotate the diopter adjustment control until the viewfinder display is in sharp focus.
