.
.Parts of the Camera
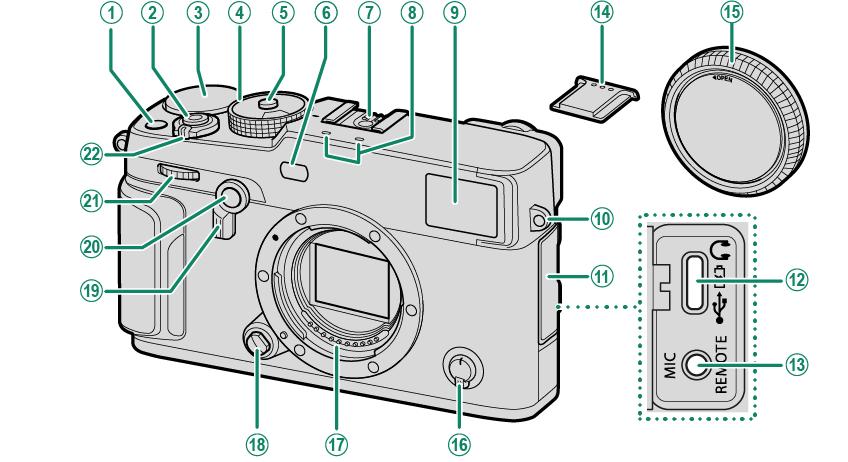
A[Fn1] button
BShutter button
CExposure compensation dial
DShutter speed dial/Sensitivity dial
EDial lock release
FAF-assist illuminator
Self-timer lamp
GHot shoe
HMicrophone
IViewfinder window
JStrap eyelet
KConnector cover
LUSB connector (Type-C)
MMicrophone/remote release connector (⌀2.5 mm)
NHot shoe cover
OBody cap
PFocus mode selector
QLens signal contacts
RLens release button
SViewfinder selector
T[Fn2] button
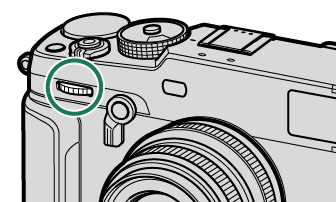
UFront command dial
V[ON]/[OFF] switch
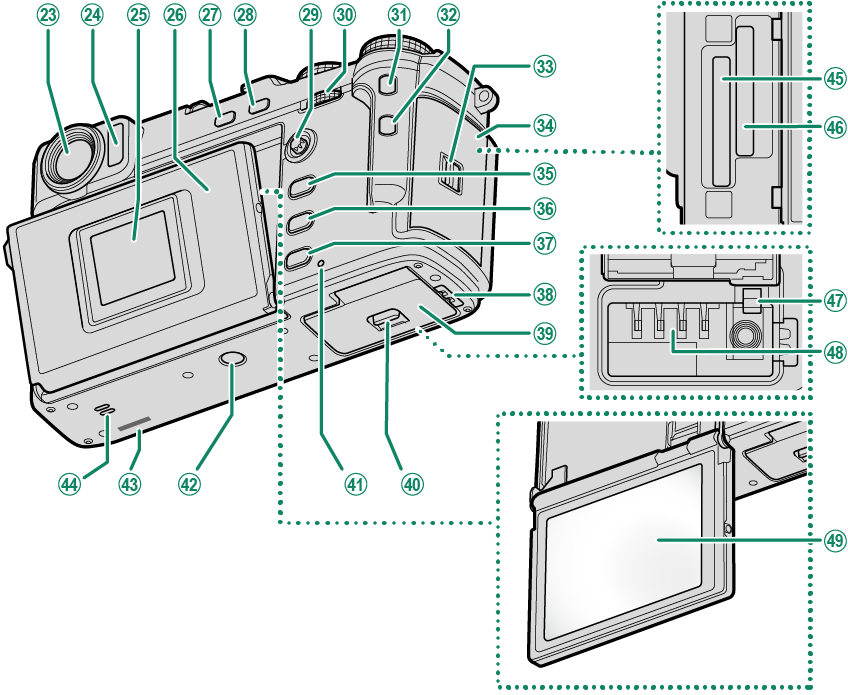
WViewfinder window
XEye sensor
YSub monitor
ZMonitor panel
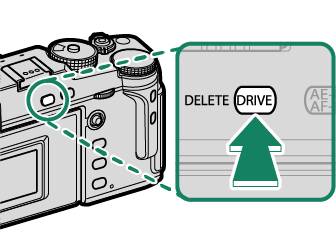
a[DRIVE] button/[DELETE] (delete) button
b[AE-L] (exposure lock)/[AF-L] (focus lock) button
cFocus stick (focus lever)
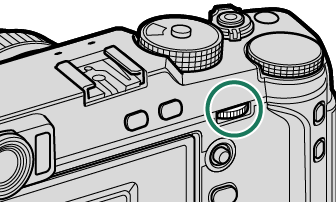
dRear command dial
e[Fn3] button
f[Q] (quick menu) button
gMemory card slot cover latch
hMemory card slot cover
i[MENU]/[OK] button
j[PLAY] (playback) button
k[DISP] (display)/[BACK] button
lCable channel cover for DC coupler
mBattery-chamber cover
nBattery-chamber cover latch
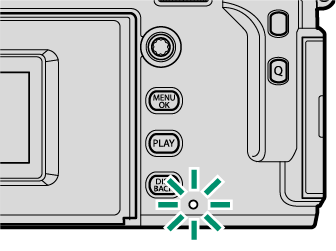
oIndicator lamp
pTripod mount
qSerial number
rSpeaker
sMemory card slot 1
tMemory card slot 2
uBattery latch
vBattery chamber
wLCD monitor
Touch screen
- The Viewfinder Window
- The LCD Monitor and Sub Monitor
- The Focus Stick (Focus Lever)
- The Shutter Speed Dial/Sensitivity Dial
- The Exposure Compensation Dial
- Focusing the Viewfinder
- The [DRIVE] Button
- The Command Dials
- The Indicator Lamp
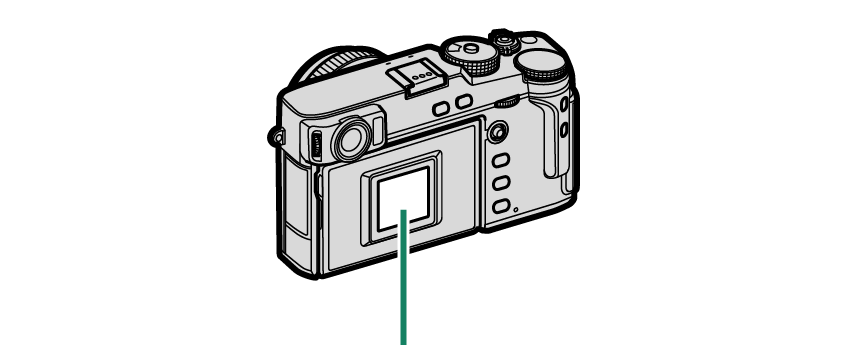
The Viewfinder Window
Use the viewfinder selector to switch between the electronic viewfinder (EVF) and the optical viewfinder (OVF). In addition, a small electronic rangefinder (ERF) window can be displayed in the OVF.
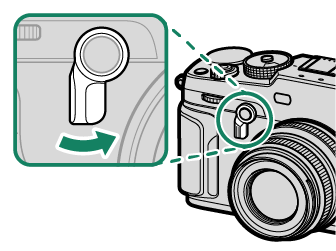
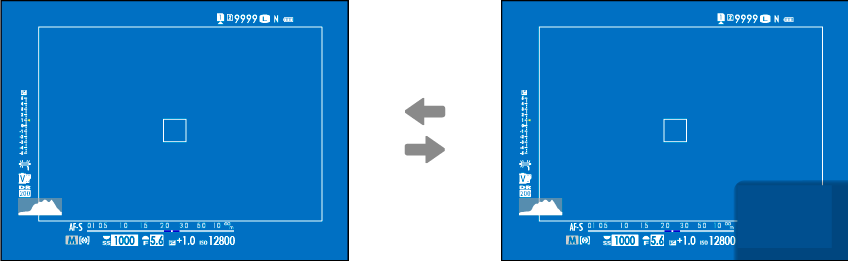
Switching Between the EVF and OVF
To switch between the EVF and OVF, pull the viewfinder selector to the right.
| EVF | OVF |
The camera automatically switches from the OVF to the EVF during movie recording.
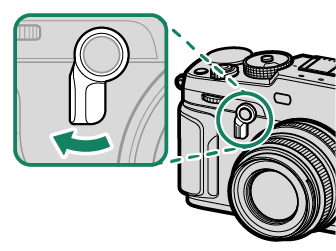
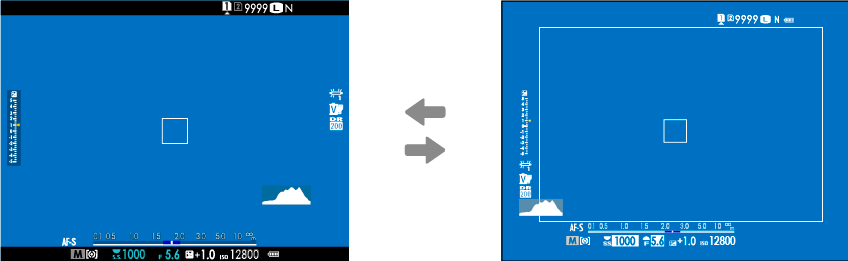
Turning the ERF On and Off
To turn the ERF on or off, pull the viewfinder selector to the left while the OVF is displayed.
| ERF off | ERF on |
The ERF is available only when r [SINGLE POINT] is selected for AF mode.
The Hybrid (EVF/OVF/ERF) Viewfinder
The features of the different displays are described below.
| Display | Description |
|---|---|
| OVF |
|
| EVF |
|
| ERF | As for the optical viewfinder but with a focus preview window. |
The LCD Monitor and Sub Monitor
Shooting settings are displayed in the sub monitor when the monitor panel is closed. Opening the panel turns the main monitor (LCD) on and the viewfinder (EVF) off.
Sub monitor
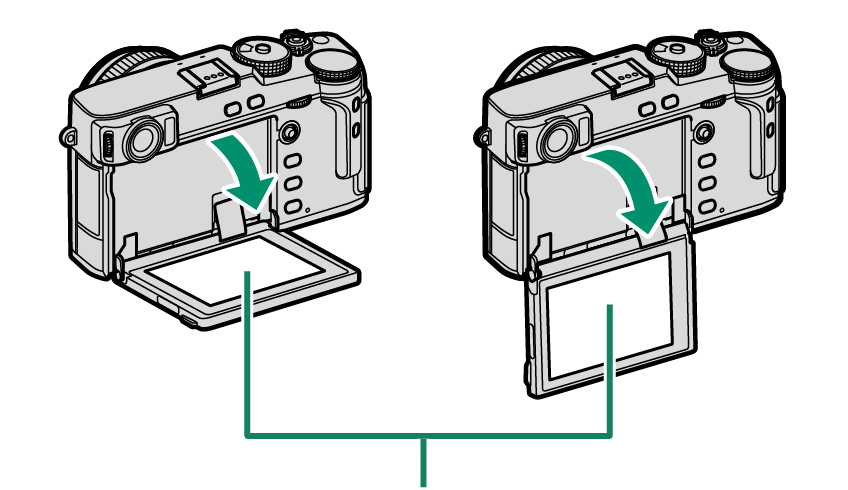
LCD monitor
When using the monitor panel, be careful that it does not catch your fingers or other objects.
Do not touch the wires behind the monitor panel. Failure to observe this precaution could cause product malfunction.
The LCD monitor also functions as a touch screen that can be used for:
The Eye Sensor
- The eye sensor controls the LCD monitor when the monitor panel is open, turning the LCD monitor off and the EVF on as required.
- The eye sensor may respond to objects other than your eye or to light shining directly on the sensor.
- The eye sensor can be disabled using D [SCREEN SET-UP] > [EYE SENSOR SETTING].
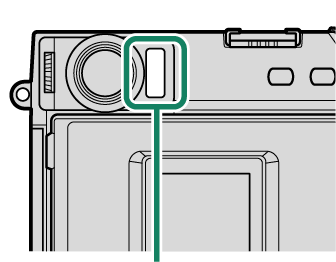
Eye sensor
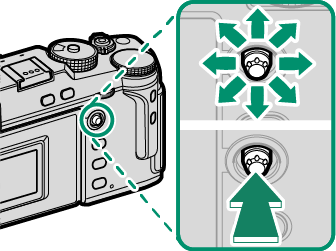
The Focus Stick (Focus Lever)
Tilt or press the focus stick to select the focus area. The focus stick can also be used to navigate the menus.
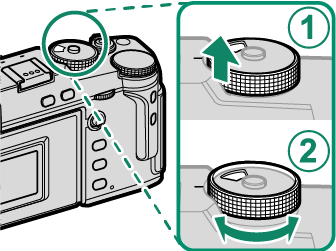
The Shutter Speed Dial/Sensitivity Dial
Shutter speed can be adjusted by rotating the shutter speed dial/sensitivity dial. Lift and rotate the dial to adjust sensitivity.
Shutter speed
Sensitivity
Sensitivity
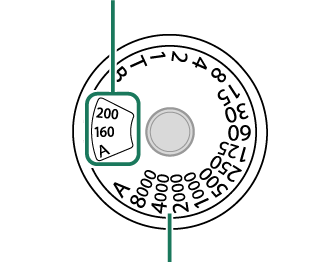
Shutter speed
To choose another shutter speed after selecting [A] (auto), hold the dial lock release and rotate the shutter speed dial.
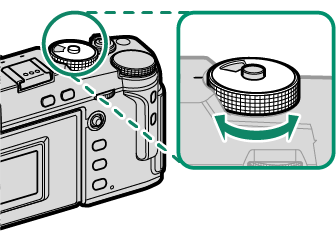
The Exposure Compensation Dial
Rotate the dial to choose an exposure compensation amount.
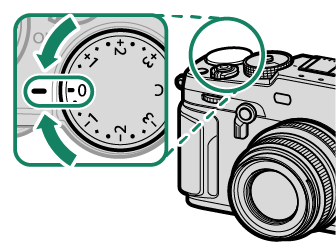
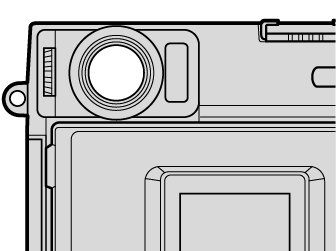
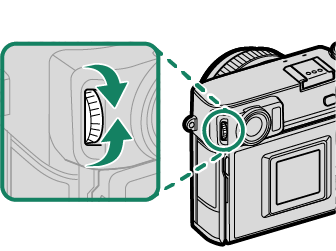
Focusing the Viewfinder
Viewfinder focus can be adjusted by rotating the diopter adjustment control.
The [DRIVE] Button
Pressing the [DRIVE] button displays the drive-mode menu.
| Mode | |
|---|---|
| B | [STILL IMAGE] (aTaking Photographs (Mode [P])) |
| N | [CONTINUOUS] R (aContinuous Shooting (Burst Mode)) |
| I | [CONTINUOUS] (aContinuous Shooting (Burst Mode)) |
| W | [ISO BKT] (a[ISO BKT]) |
| V | [WHITE BALANCE BKT] (a[WHITE BALANCE BKT]) |
| s | [BKT] (a[BKT]) |
| h | [HDR] (aHDR) |
| j | [MULTIPLE EXPOSURE] (aMultiple exposures) |
| Y | [ADVANCED FILTER] (aAdvanced Filters) |
| F | [MOVIE] (aRecording Movies) |
The Command Dials
Rotate or press the command dials to:
|
Rotate |
|
|---|---|
|
Press |
— |


1 Aperture set to [A] (auto) and lens equipped with aperture ring or [COMMAND] selected for D [BUTTON/DIAL SETTING] > [APERTURE RING SETTING (A)].
2 Can be changed using D [BUTTON/DIAL SETTING] > [COMMAND DIAL SETTING].
3 [C] selected for sensitivity.
4 Available only if [FOCUS CHECK] is assigned to a function button.
5 Exposure compensation dial rotated to [C].
|
Rotate |
|
|---|---|
|
Press |
|
1 Aperture set to [A] (auto) and lens equipped with aperture ring or [COMMAND] selected for D [BUTTON/DIAL SETTING] > [APERTURE RING SETTING (A)].
2 Can be changed using D [BUTTON/DIAL SETTING] > [COMMAND DIAL SETTING].
3 [C] selected for sensitivity.
4 Available only if [FOCUS CHECK] is assigned to a function button.
5 Exposure compensation dial rotated to [C].
The Indicator Lamp
Camera status is shown by the indicator lamp.
| Indicator lamp | Camera status |
|---|---|
| Glows green | Focus locked. |
| Blinks green | Focus or slow shutter speed warning. Pictures can be taken. |
| Blinks green and orange |
|
| Glows orange | Recording pictures. No additional pictures can be taken at this time. |
| Blinks red | Lens or memory error. |
* Displayed only if pictures are selected for upload.
Warnings may also appear in the display.
The indicator lamp remains off while your eye is to the viewfinder.
The B [MOVIE SETTING] > [TALLY LIGHT] option can be used to choose the lamp (indicator or AF-assist) that lights during movie recording and whether the lamp blinks or remains steady.